Rehire Action (PA) - Create Rehire Action
Use this procedure to rehire an employee in HRMS. The employee must already be assigned a personnel number in HRMS, and is currently withdrawn.
This procedure may require hand-offs to other roles (payroll processor and/or benefits processor) depending on the structure of your agency and your role at your agency. The payroll processor should refer to the Rehire Action (PY) - Create Rehire Action procedure and the benefits processor should refer to the Rehire Action (BN) - Create Rehire Action procedure for their portions of the action.
If the employee has an active Out of State Work Location record on the Addresses (0006) infotype and the employee no longer works outside of the state of Washington, refer to the Addresses – Change Existing Record procedure to delimit the record.
Communicate with your time & attendance processor if the returning employee has an existing Sick Leave quota balance that needs to be removed. Refer to the Quota - Removing Accrued Leave procedure.
Be sure to communicate with your payroll processor before entering a retroactive action.
-
Step 1
Enter transaction code PA40 in the command field and click the Enter button.
-
Step 2
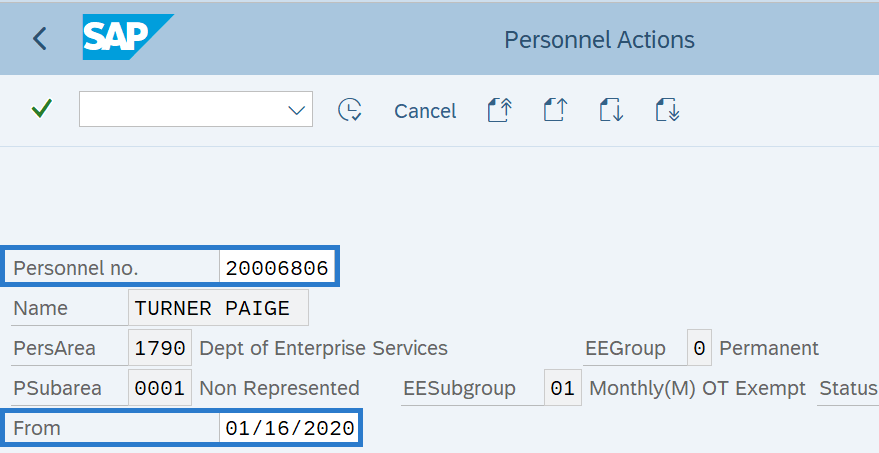
Complete the following fields:
- Personnel no.
- From
-
Step 3
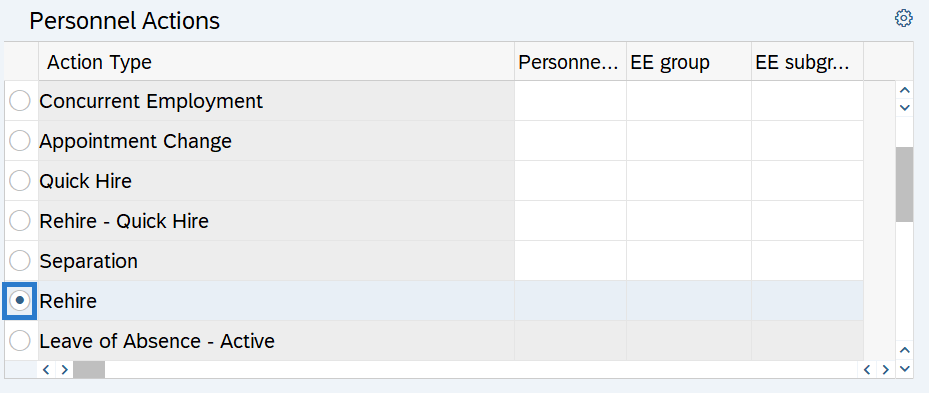
Select the Rehire radio button.
-
Step 4
Click the Enter button to validate the information.
-
Step 5
Click the Execute button to begin the transaction.
-
Step 6
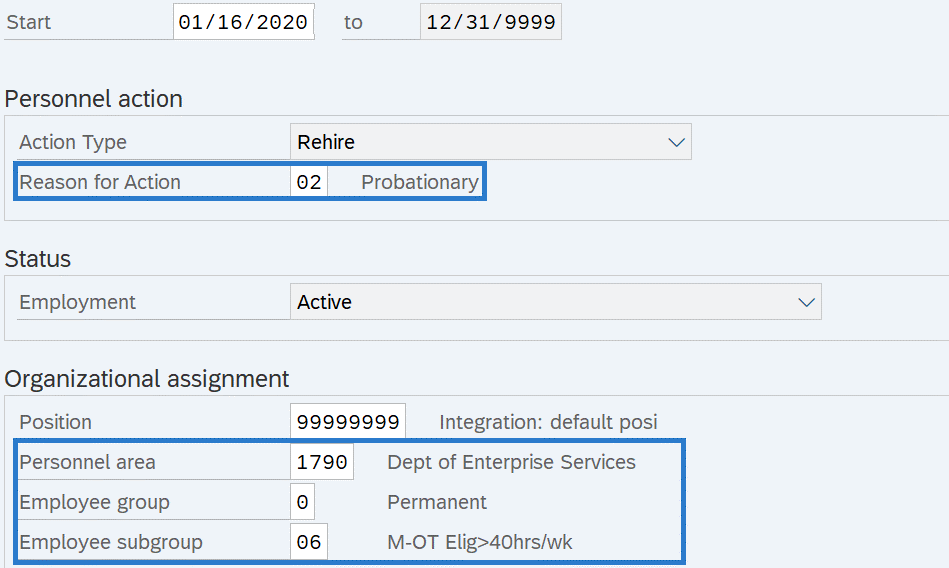
Complete the Actions (0000) infotype.
The following fields are mandatory:
The following fields will default:
- To
- Action Type
- Employment
-
Step 7
Click the Enter button to validate the information.
-
Step 8
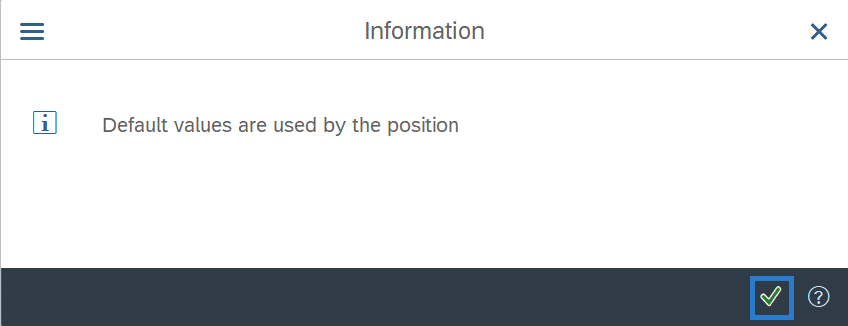
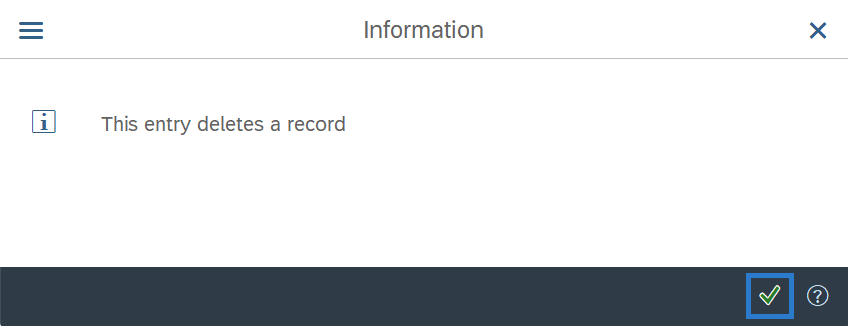
An information window will appear. Click the Continue button.
-
Step 9
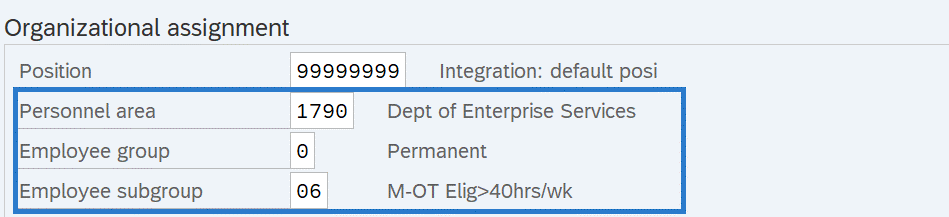
The following fields defaulted from the position. Confirm the defaulted values are correct, or make necessary changes:
- Personnel area
- Employee group
- Employee subgroup
-
Step 10
Click the Save button.
-
Step 11
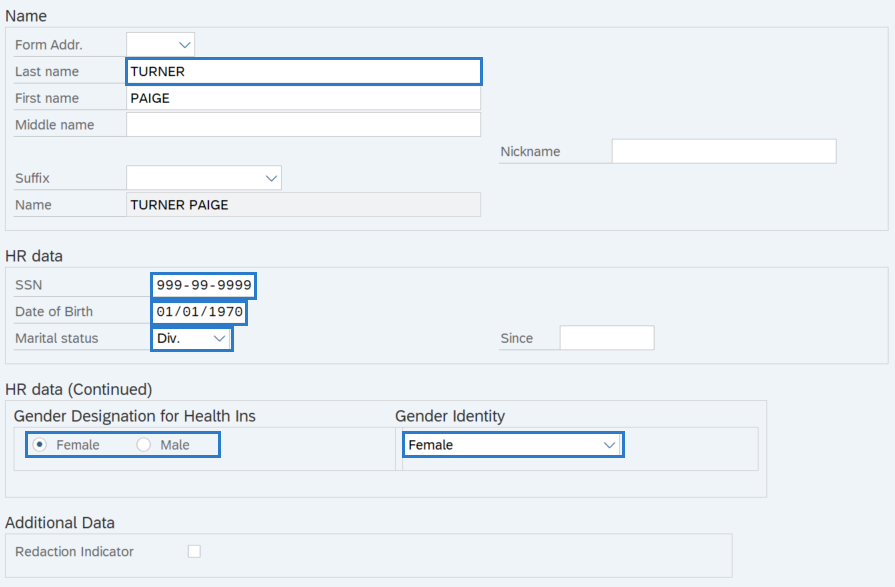
Complete the Personal Data (0002) infotype.
Review the existing infotype and make any updates. If no changes are necessary, click the Next Record button and skip to step 14.
The following fields are mandatory:
- Last Name
- SSN
- Date of Birth
- Marital Status
- Gender Designation of Health Ins
- Gender Identity
The following fields are optional:
- First name
- Middle name
- Nickname
- Marital status Since
- Redaction Indicator
 TIPS:
TIPS:The employee must have a Social Security Number. There are special employer responsibilities when hiring workers who have applied for and are waiting to receive a SSN and card. Refer to the SSA’s fact sheet: Employer Responsibilities When Hiring Foreign Workers. If you have hired a worker who has applied for a SSN but has not received it, contact HereToHelp@ofm.wa.gov for guidance on what to enter in this field.
It is extremely important to enter the correct Social Security Number in HRMS. There are several downstream systems that use SSN as the employee’s unique identifier, including our healthcare and retirement systems. Manual corrections by both the agency processors and OFM ITS staff will be required if an incorrect SSN is used.
In order to avoid a failure during Year End Social Security Verification, the Name should match the Social Security Card exactly.
For additional coding information for the Gender Designation of Health Ins and Gender Identity fields, refer to the Affirmative Action and Demographic Data Guide.
Select the Redaction Indicator box to indicate an employee’s personally identifying information may need to be redacted before released outside the agency. This indicator is a flag only and will not automatically redact records. Always review the data definition and consult with your agency’s Privacy Officer and/or Public Records Officer prior to redacting any information.
The Last Name, First Name, Middle Name, and Nickname fields will allow the following characters:
- Entire alphabet – upper and lower case
- Numeric values – 0123456789
- Special characters – * ` % & - ! , . : ; / ( ) “ ‘ # and space
When any other character is entered, an error message will appear “Invalid character(s) in XXX field. Correct to proceed.”
-
Step 12
Click the Enter button to validate the information.
-
Step 13
Click the Save button.
-
Step 14
Complete the Organizational Assignment (0001) infotype. Most fields will default based on the position’s value.
The following field is mandatory:
The following fields are optional:
- Org. Key
- Time
Fields may carry over from the previous infotype record. Review all fields and make applicable changes.
 TIPS:
TIPS:If the employee will be doing a different job than that assigned to their position (such as in-training or under fill appointments), notify your organizational management processor so they can create a Job to Person Relationship. Refer to the In-Training Appointments Coding Reference Guide for additional coding guidance.
-
Step 15
Click the Enter button to validate the information.
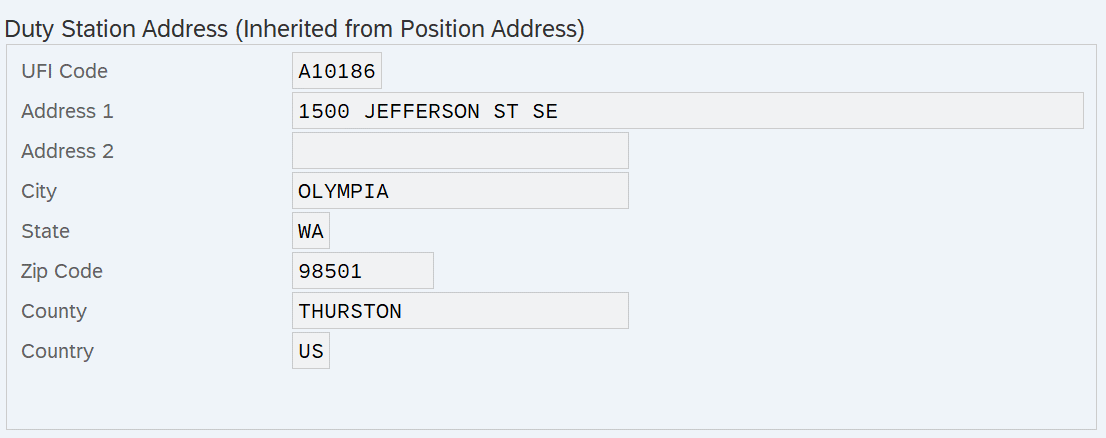
The following fields will populate based on the position’s Address (1028) infotype.
- UFI
- Address 1
- Address 2
- City
- State
- Zip Code
- County
- Country
-
Step 16
Click the Save button.
TIPS:If the Delimit Vacancy box appears, select the appropriate option for your agency’s position. This box will only appear if the position’s vacancy indicator is marked “Open”. Refer to the Vacancy Indicator Guide for more information.
If you are hiring an employee back into your agency, skip to step 24.
If you are hiring an employee who has not previously worked for your agency, proceed to step 17.
-
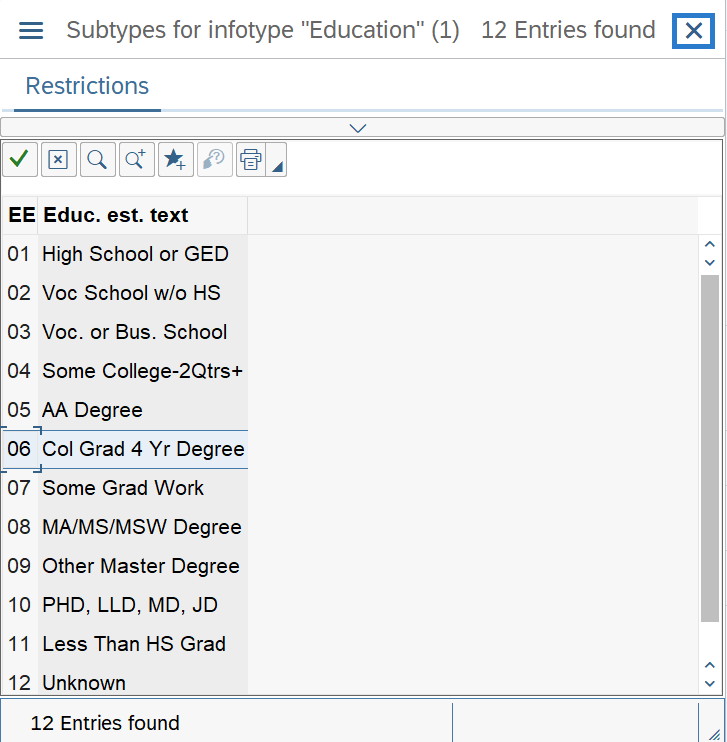
Step 17
Click the Close button to by-pass the Subtypes for infotype "Education" box.
-
Step 18
Select the Rehire radio button. Do not enter a From date.

-
Step 19
Click the Execute button.
-
Step 20
Click the Execute info group button on the Actions (0000) infotype.

-
Step 21
An information window will appear. Click the Continue button.
-
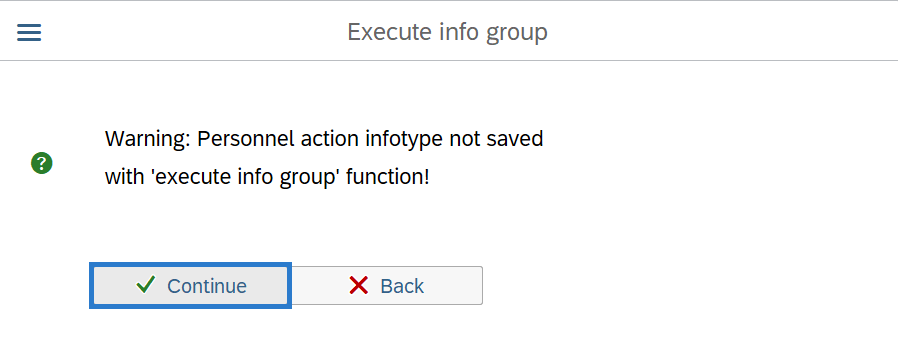
Step 22
Click Continue in the Execute info group dialog box.
 TIPS:
TIPS:This infotype was already saved and it is okay to continue.
-
Step 23
Click the Next Record button until you reach the Contract Elements (0016) infotype.
-
Step 24
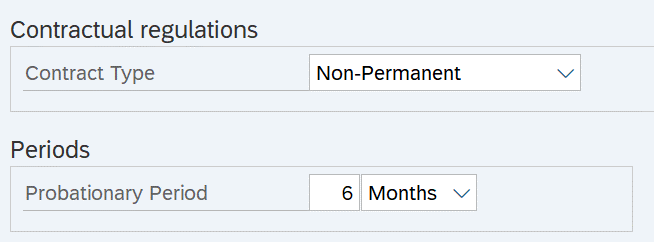
Complete the Contract Elements (0016) infotype.
The following field is mandatory:
The following field is optional:
- Probationary Period
 TIPS:
TIPS:If the Probationary Period field is left blank, the Monitoring of Tasks (0019) infotype is skipped. Go to Step 30.
-
Step 25
Click the Enter button.
-
Step 26
Click the Save button.
-
Step 27
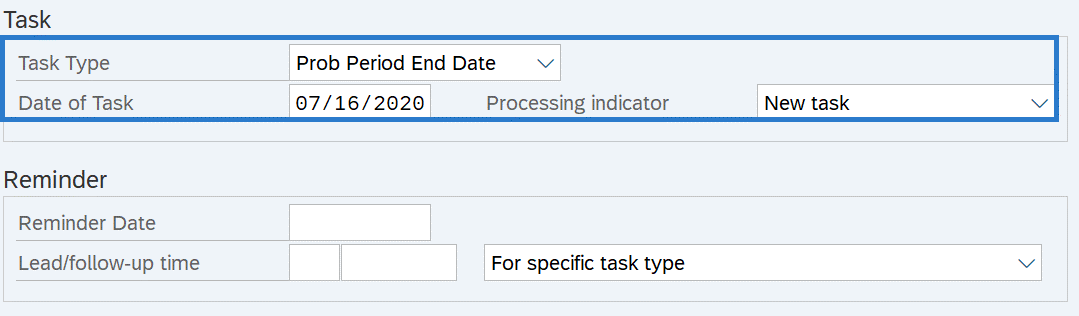
Complete the Monitoring of Tasks (0019) infotype.
The following fields will default:
- Task Type
- Date of Task
- Processing indicator
The following fields are optional:
- Reminder Date
- Lead/follow-up time
 TIPS:
TIPS:The Reminder Date field can be completed by one of the following:
- Enter a Reminder Date, or
- Enter the Lead/follow-up time. The Reminder Date field will populate based on what was entered in the Lead/follow-up time field, or
- Leave Reminder Date and Lead/follow-up time blank. The Reminder Date field will populate with a date two months prior to the Date of Task.
Run the Task Monitoring Report (S_PH0_48000450) to view the reminder dates and task dates for the tasks entered on this infotype.
Only one task can be entered during the rehire action (PA40). If you have more than one task to create for the employee, follow the Monitoring of Tasks - Create New Record procedure after you have completed the action.
-
Step 28
Click the Enter button to validate the information.
-
Step 29
Click the Save button.
-
Step 30
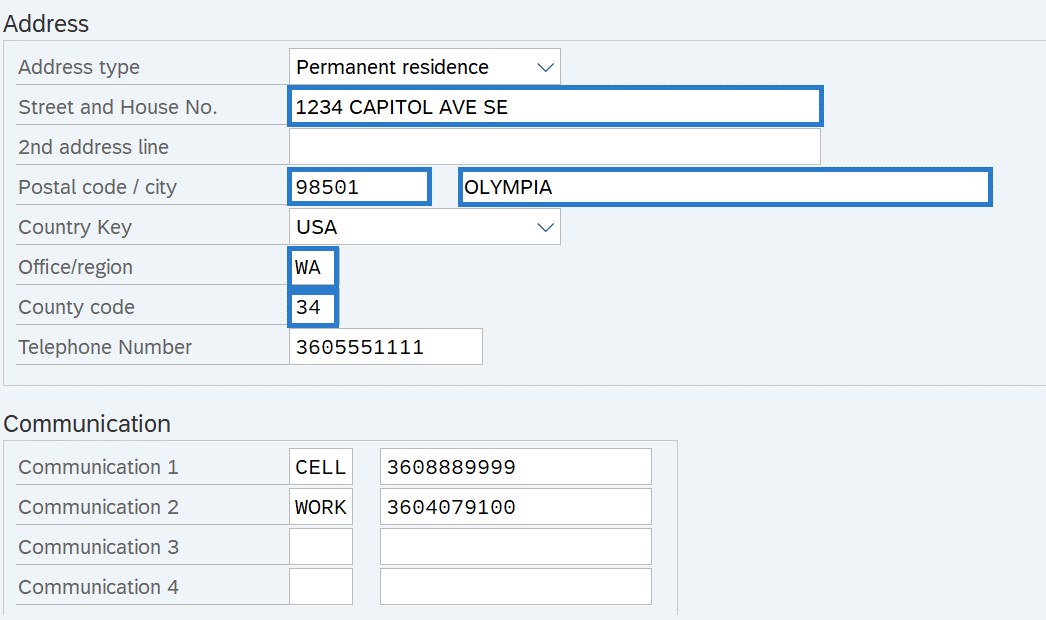
Complete the Addresses (0006) infotype.
Review the existing infotype and make any updates. If no changes are necessary, click the Next Record button and skip to step 33.
The following fields are mandatory:
- Address Type
- Street and House No.
- Postal Code
- City
- Office/region
- County code
 TIPS:
TIPS:The address fields will allow the following characters:
- Entire alphabet – upper and lower case
- Numeric values – 0123456789
- Special characters - * ` % & - ! , . : ; / ( ) “ ‘ # and space
When any other character is entered, an error message will appear “Invalid character(s) in XXX field. Correct to proceed.”
It is recommended that you use USPS Address Lookup Tool to ensure addresses are entered correctly.
In order to process payroll, employees must have an active Permanent residence address. If you have multiple address types to enter, enter the permanent residence address now, then follow the Addresses - Create New Record procedure to enter the Mailing address or Out of State Work Location address after the new hire action is complete.
If the employee receives a warrant by mail, ensure the address that is active on Day 3 of payroll processing is the correct address.
Do not enter out of country addresses for Permanent residence or Mailing Address types; it may cause redlines or other errors. If the employee lives out of country, it is recommended that the Permanent Residence or Mailing address records reflect either:
- The agency address is entered and the agency then mails all items to the employee's out of country address as necessary; OR
- The employee selects an address to use within the US, such as a family member or friend who is willing to forward their mail to their out of country address
Out of country addresses can be entered for an Out of State Work Location address type.
Employees working outside of the state of Washington require an Out of State Work Location address record.
Ensure you are using the correct County Codes:
- Permanent Residence and Mailing Address require a 2-digits County Code. If an out of state address is created for Permanent Residence and Mailing Address the county code should be entered as 40-Out of State.
- Out of State Work Location address types require a 3-Digit County Code.
Be aware that Pay1 permanent residence address lines have shorter character limits than HRMS. HRMS will allow up to 35 characters in Address Lines 1 and 2, while Pay1 will only allow 30. Consider limiting the HRMS address to 30 characters so the complete address can be transferred to Pay1.
-
Step 31
Click the Enter button to validate the information.
-
Step 32
Click the Save button.
-
Step 33
Complete the Communication (0105) infotype.
The following field is mandatory:
- System ID
 TIPS:
TIPS:The System ID field should be the employee’s email address.
If you are a MyPortal agency, it is highly recommended to use an employee’s work email address. This email address is used for password resets and the leave request notification process.
Agencies that have employees who do not have a work email address will need to determine an internal business process to notify these employees of the status of a leave request.
If you do not know the employee’s work email address at the time of the rehire, click the Next Record button and skip to step 36. Then enter the email address as soon as you obtain it by following the Communication - Create New Record procedure.
During the Rehire Action, only an Email record can be created in the Communications (0105) infotype. If the employee will have access to Workday Financials during Phase 1A, follow the Communication - Create New Record procedure to create a WD1A record after you have completed the action.
-
Step 34
Click the Enter button to validate the information.
-
Step 35
Click the Save button.
-
Step 36
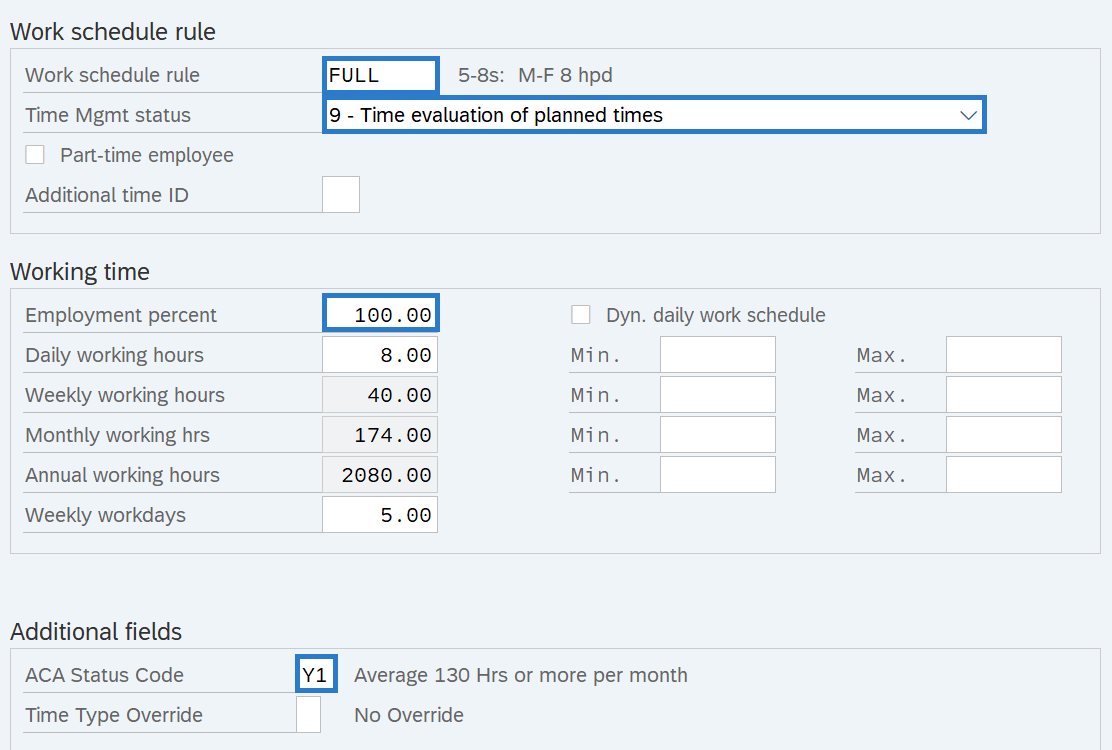
Complete the Planned Working Time (0007) infotype.
If the rehire date is not the first day of the pay period, change the Planned Working Time (0007) infotype start date to the first day of the pay period.
The following fields are mandatory:
The following fields will default:
- Work schedule rule
- Time Mgmt status
- Part-time employee
- Additional time ID
- Employment percent
- Time Type Override
 TIPS:
TIPS:The Work schedule rule will default based on the Employee Subgroup entered in the action. You will need to select the appropriate work schedule of the employee.
The Part-time employee box is used to determine new employee eligibility for auto-enrollment in the DCP. New employees (new hires and rehires) with the Part-time employee box checked will not be automatically enrolled in the DCP. It is important to check this box for all part-time employees. This field will default, but please validate the default value is correct. Refer to the Part-time Employees Coding Reference Guide for more information on coding part-time employees.
If the employee is changing from or to the 24/7 (R030) work schedule rule and the Rehire date is not the 1st or 16th of the month, then the employee will have a red-line during payroll processing. To avoid a possible red-line, change the Planned Working Time (0007) infotype start date to the first day of the pay period.
The Additional Time ID field defaults to blank, but should be changed if the employee is not eligible for normal vacation and sick leave accruals.
The ACA Status Code is required for all new hires, rehires and employees who have had change in employment status. Do not leave the default code of “Not Assigned.” Please refer to the Affordable Care Act (ACA) Employee Status Code instructions to determine the correct ACA Code.
The Time Type Override field is optional and only required if the agency needs to override the general timesheet requirements of an employee.
-
Step 37
Click the Enter button to validate the information.
-
Step 38
Click the Save button.
-
Step 39
Complete the Telework/Flex Work (Employee) (9106) infotype.
The following fields are conditional:
 TIPS:
TIPS:Employees should have an active Telework/Flex Work (Employee) record. Refer to the HRMS Data Definitions Resource Guide for more information on how this data is used.
Enter the employee's participation in the Telework (EE), Flextime (EE), and Compressed Workweek (EE) fields. Do not leave these fields blank. If the employee is not participating, then use the Not Participating (NP) selection value instead of blank.
Completing the Flex work hours is optional. HRMS automatically converts entries to the Flex work hours fields to “German Standard” Military Time. If you have someone whose start or end time is midnight, use “24:00:00” rather than 12:00 am. If 12:00 am is entered, it will default to 00:00:00 and you must overwrite the default value with “24:00:00.”
-
Step 40
Click the Enter button to validate the information.
-
Step 41
Click the Save button.
-
Step 42
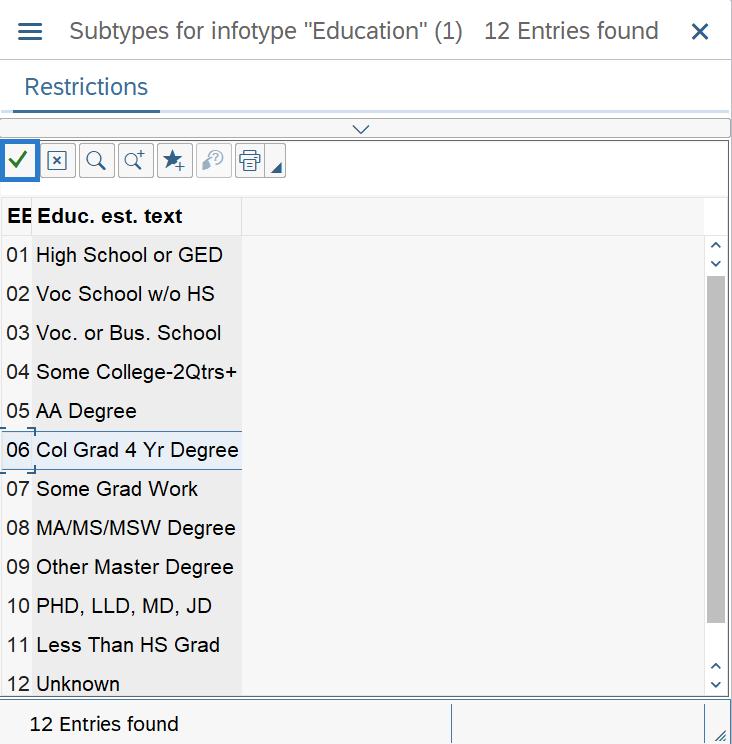
Select the proper level of education and click the Copy button.
 TIPS:
TIPS:The Education (0022) infotype can be skipped by clicking the close button on the Subtypes for infotype "Education" window. Go to step 46.
-
Step 43
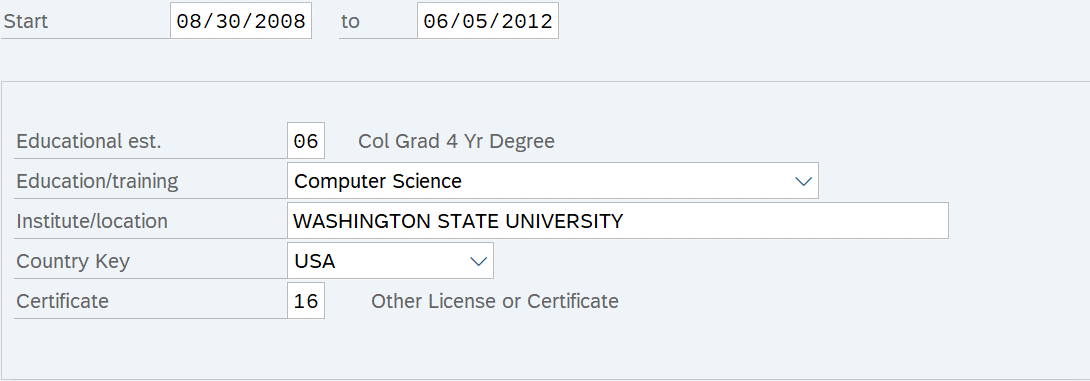
Complete the Education (0022) infotype.
Review the existing infotype and make any updates. If no changes are necessary, click the Next Record button and skip to step 46.
The following fields are mandatory:
- Start
- to
- Education/training
- Institute/location
- Certificate
 TIPS:
TIPS:The Start and To dates should be the start and end dates of the employee’s education or training.
-
Step 44
Click the Enter button to validate the information.
-
Step 45
Click the Save button.
-
Step 46
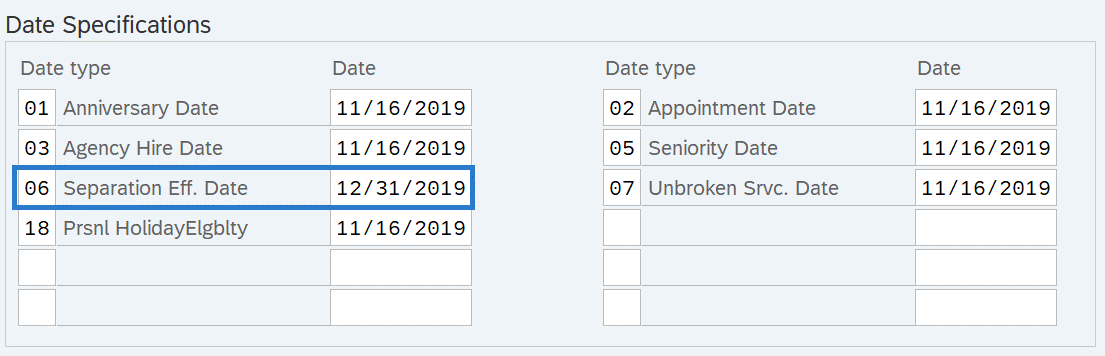
Complete the Date Specifications (0041) infotype.
Fields will carry over from the previous infotype record. Review all fields and make applicable changes.
Remove the Date and Date Type for Separation Eff. Date (06).
For each Date type, the following field is mandatory:
- Date
 TIPS:
TIPS:In HRMS, you are limited to 12 date types for each record.
The Prsnl Holiday/Elgblty (18) date type is the date an employee is eligible to take a personal holiday. The Prsnl Holiday/Elgblty will default to the employee’s previous personal holiday eligibility date. If the employee is not eligible to take a personal holiday when they start employment, you will need to change the date to when they are eligible.
Personal Holiday quotas are only created by the system at the end of the calendar year and available to use at the beginning of the next year. Employees who are hired after the beginning of the year and are entitled to a Personal Holiday will need to have their quota entered manually; refer to the Quota Generate Accruals Manually procedure. If the employee was previously employed and worked earlier in the calendar year, a personal holiday may be available for them to use. Or, if the personal holiday was already used, the employee should not be given another one manually.
If the employee was a represented employee and is being hired as a non-represented employee, the date type Prsnl LV Day Elgblty (26) must be removed.
If you've already calculated the employee's new Anniversary Date with their prior state service, you can enter it here. Otherwise, leave the default value for now, then follow the Date Specifications user procedures once you've calculated the adjusted date. For more information on calculating date adjustments, refer to the Date Adjustment Guide.
-
Step 47
Click the Enter button to validate the information.
-
Step 48
Click the Save button.
-
Step 49
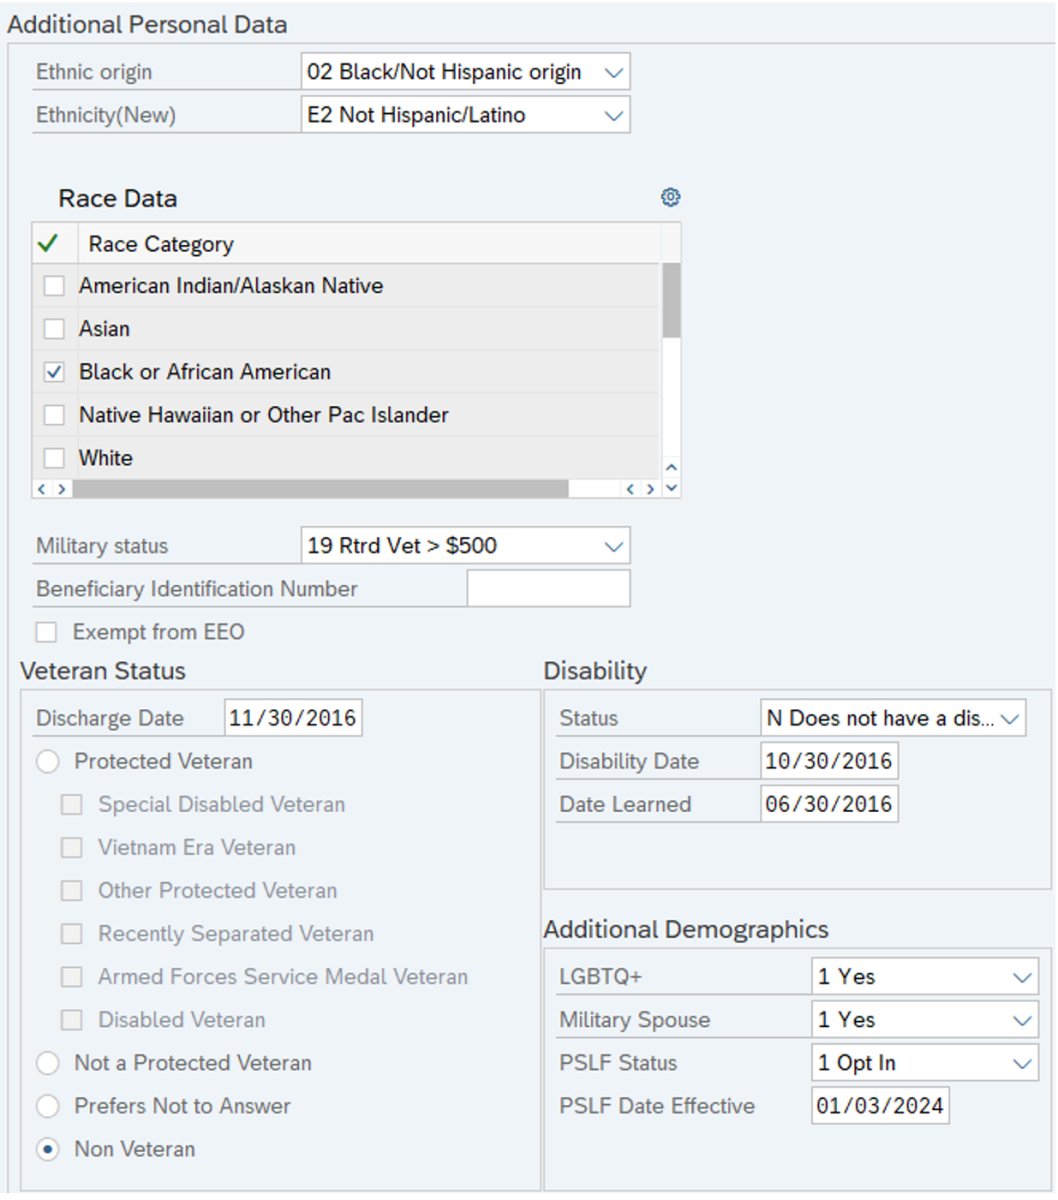
Complete the Additional Personal Data (0077) infotype.
Review the existing infotype and make any updates. If no changes are necessary, click the Next Record button and skip to step 58.
The following fields are optional:
- Ethnic origin
- Ethnicity (New)
- Race Data
- Military Status
- Exempt from EEO
- Veteran Status
- Disability
- LGBTQ+
- Military Spouse
- PSLF Status
- PSLF Date Effective
 TIPS:
TIPS:Ethnic Origin is the primary source of data for "persons of color" head count in enterprise reports. Use the Ethnic Origin Crosswalk in the Affirmative Action and Demographic Data Guide to make the correct selection based on the employee's ethnicity and race.
The Race and Ethnicity(New) fields are used in federal reporting on the EEO-4 report. If the Ethnicity(New) field is set to Not Hispanic/Latino (E2), then one or more Race checkboxes must be selected or the employee will not be counted in the male/female by race columns on the EEO-4 report.
When Ethnic Origin and Ethnicity(New) fields are both populated, HRMS displays a warning message “Ethnicity (New) field maintained thus Ethnic origin field is disregarded”. This message is referring to the Ethnic Origin field being disregarded on the EEO-4 report. Ensure the appropriate selections are made in all fields for the employee to be reported accurately.
In the Race Data group, click the checkbox to the left of the appropriate Race Category to select. If multiple races are selected, the system will prompt you to also check the Two or More Races box. Do not check Two or More Races by itself.
To enable the Protected Veterans selection boxes, select the Protected Veterans radio button and click enter.
The option (X) Has a Disability (or previously had one) should only be used for employees with a current disability. Do not use this option for employees who previously had a disability since they no longer meet the definition; use (N) Does not Have a Disability.
Disability Date is not used by the state of Washington; however, HRMS requires an entry if the Disability Status is set to Has a disability (or previously had one) (X). If you know the employee's disability date, you can enter that date; otherwise, enter the date you learned of the disability (same date as the Date Learned field).
The PSLF Status will default to Unspecified. Enter the appropriate selection for the employee.
The PSLF Date Effective should reflect the date an employee’s PSLF opt in or opt out status is effective, or the date the employee’s employment was last certified.For additional coding information for the Additional Personal Data (0077) infotype, refer to the Affirmative Action and Demographic Data Guide.
-
Step 50
Click the Enter button to validate the information.
-
Step 51
Click the Save button.
-
Step 52
Complete the Military Service (0081) infotype.
The following fields are mandatory:
- Start
- To
- Service Type
 TIPS:
TIPS:The Military Service (0081) infotype will only appear if a new Military Status other than Non/Unspec Vet’s Status was chosen on the Additional Personal Data (0077) infotype in the previous step. Skip to step 58 if the Military Service (0081) infotype did not appear.
The Start and To dates should be the start and end dates of the employee's military service, and should match the employee's Form DD214 or other appropriate documentation. If their service has not ended, then use 12/31/9999 as the end date.
-
Step 53
Click the Enter button to validate the information.
-
Step 54
Click the Save button.
-
Step 55
Complete the Time Specification/Employ. Period (0552) infotype.
The following fields are mandatory:
- Start
- To
The following Imputable period fields are optional:
- Years
- Months
- Days
 TIPS:
TIPS:The Start and To dates should be the start and end dates of the employee’s military service, and should match the employee’s Form DD214 or other appropriate documentation. If their service has not ended, then use 12/31/9999 as the end date.
The Duration of validity period section and the Imputable Period section may not match:
- The Duration of validity period is system-calculated based on the infotype start and to dates, and will be populated upon clicking Enter.
- The Imputable period fields should be entered to show the actual days, months, and years recorded on the employee's Form DD214.
-
Step 56
Click the Enter button to validate the information.
-
Step 57
Click the Save button.
-
Step 58
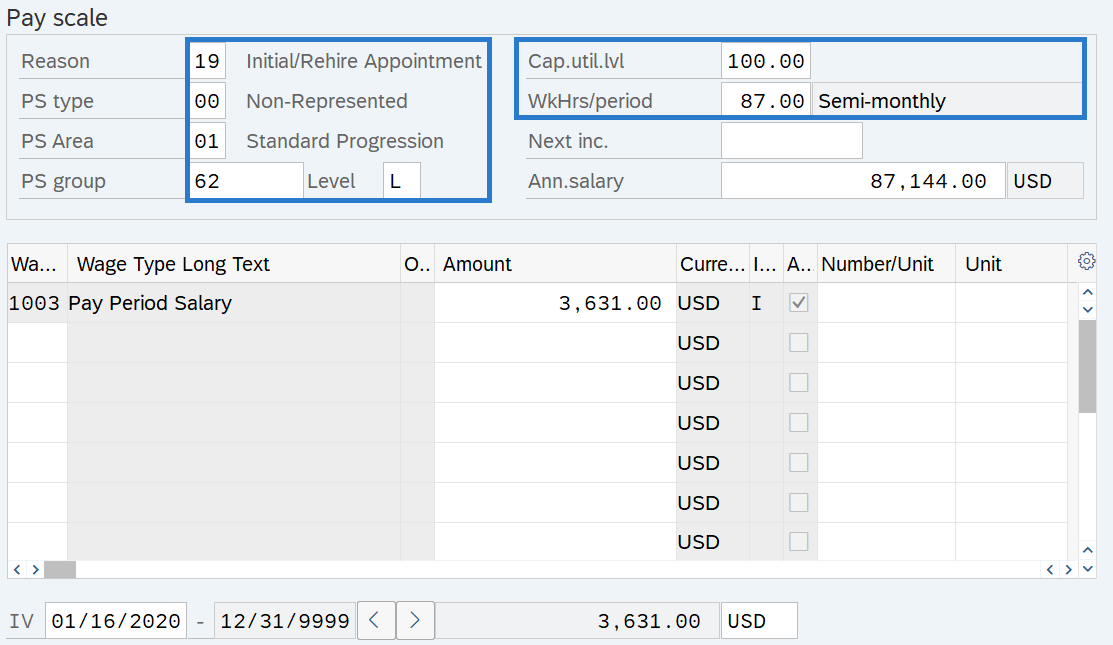
Complete the Basic Pay (0008) infotype.
For employees who are indirectly valued, the following field is mandatory:
For employees who are directly valued, the following fields are mandatory:
- Reason
- Wage Type Amount or Ann.salary
For all employees, the following fields will default. Ensure the defaulted values are accurate and make changes if necessary:
- PS type
- PS Area
- Level
- Cap.util.lvl
- WkHrs/period
- Next Inc.
- Wage Type
- Ind.val
 TIPS:
TIPS:The employee's Cap.util.lvl and WkHrs/period fields will default based on the employee's Planned Working Time (0007) infotype.
The employee’s pay scale / pay grade fields will default based on the employee’s position Planned Compensation (1005) infotype. The PS group should match the Pay Scale Group or Pay Grade of the job the employee is assigned. If the employee’s job is different than the position’s job, such as an in-training appointment, then change the PS Group to match the Pay Scale Group or Pay Grade of the job they are assigned. For more information on coding in-training appointments, refer to the In-Training Appointments Coding Reference Guide.
Next Inc. is the date an employee is scheduled to move to a higher salary step within the salary range of their current job class. This field is used as an override when there are exceptions to the rules built into the system, or if an agency prefers to manually enter this date. If no date is entered, the system will follow the Automated PID Process.
Manually enter the next increase date during the Rehire action to ensure employees receive their periodic increment on the correct date.
Ind.val. indicates whether an employee’s pay is indirectly valued or directly valued.
- Indirectly valued pay is derived from a salary schedule table and will automatically update when the salary schedule tables are changed. Enter the PS group and Level fields and the system will populate the wage type Amount and Ann.salary fields based on the salary schedule.
- Directly valued pay is manually entered into the wage type Amount (recommended) or Ann.salary fields.
The wage type will default based on the employee’s Employee Subgroup. Wage type 1003 is used for monthly, wage type 1001 is used for hourly, and wage type 1006 is used for daily. Enter the correct wage type if the field is blank. You can also enter wage types for additional pay, such as shift premium and assignment pay.
-
Step 59
Click the Enter button to validate the information.
-
Step 60
Click the Save button.
Stop:Be sure to communicate with your payroll processor if the employee lives or works outside of the state of Washington.
For the personnel administration processor, this will mark the end of the Rehire action. After saving, click the Exit button and transfer the rehire information packet to the payroll processor who will continue the action. The payroll processor should refer to the Rehire Action (PY) - Create Rehire Action procedure to complete their portion of the action.