Rehire Action (PA) - Correct Erroneous Rehire Date
Use this procedure to correct the rehire date of an employee who had an incorrect effective date entered during the rehire action.
If any rehire entries were made by the payroll, benefits, or time and attendance processors, please contact them to delete all infotype records created during their portions of the erroneous rehire action. Additionally, it is important to work with your payroll office to identify and remedy any over/underpayment situations if necessary.
Effective Dates for all records should follow the Effective Dating Infotypes guidelines.
Always correct the Organizational Assignment (0001) infotype last. This will ensure that you still have security access to the employee while making corrections.
This is a generalized example of correcting a Rehire Date. The steps may vary depending on the infotypes that were created/updated during the Rehire Action. For specific instructions, please contact HereToHelp@ofm.wa.gov.
Please Note: For this example, we will use an employee whose incorrect Rehire Date was 10/1/2019. Each infotype created during the erroneous Rehire Action will be deleted and a correct PA40 rehire action will be entered.
-
Step 1
Contact the time and attendance, benefits, and payroll processors to notify them that the employee’s rehire date is not accurate in HRMS. Request that they delete all records created during their portion of the erroneous rehire action. They should refer to the Rehire Action (PY) - Correct Erroneous Rehire Date and Rehire Action (BN) - Correct Erroneous Rehire Date procedures.
TIPS:Once the time and attendance, benefits, and payroll processors have completed their deletions, the personnel administration processor will move forward with deleting all records created during their portion of the rehire.
-
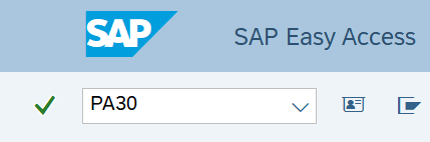
Step 2
Enter transaction code PA30 in the command field and click the Enter button.
-
Step 3
Complete the following fields:
- Personnel no.

-
Step 4
Click Enter to populate the employee information.
-
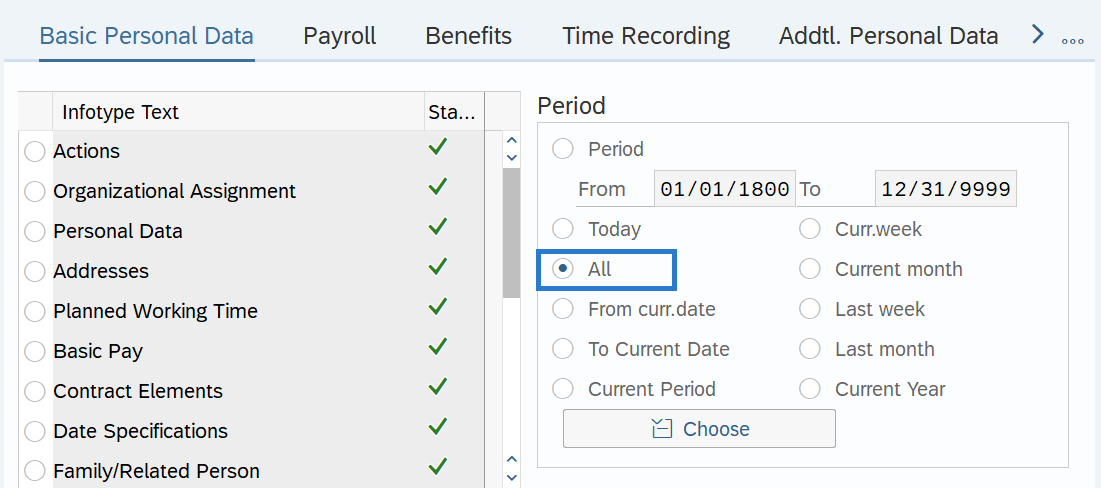
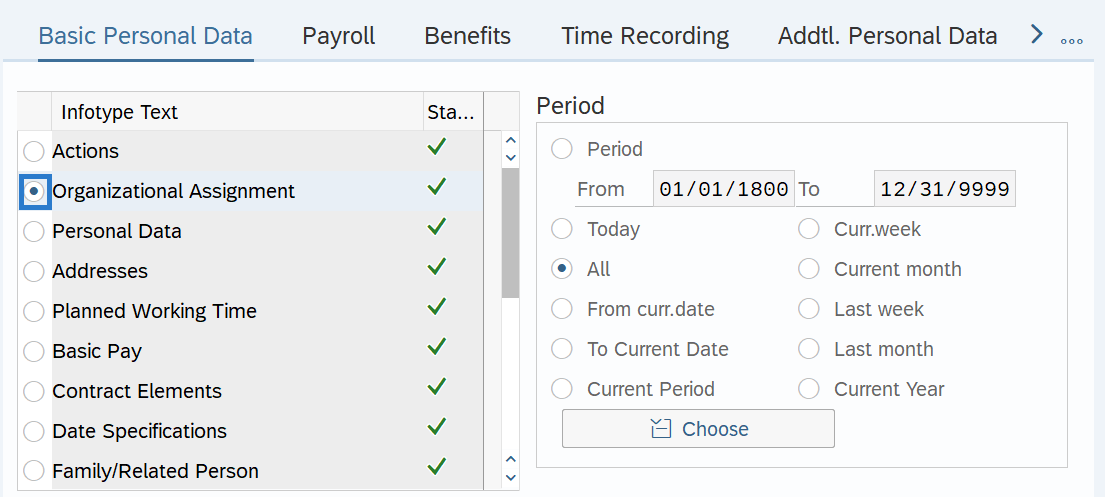
Step 5
Select All radio button in the Period Selection box.
-
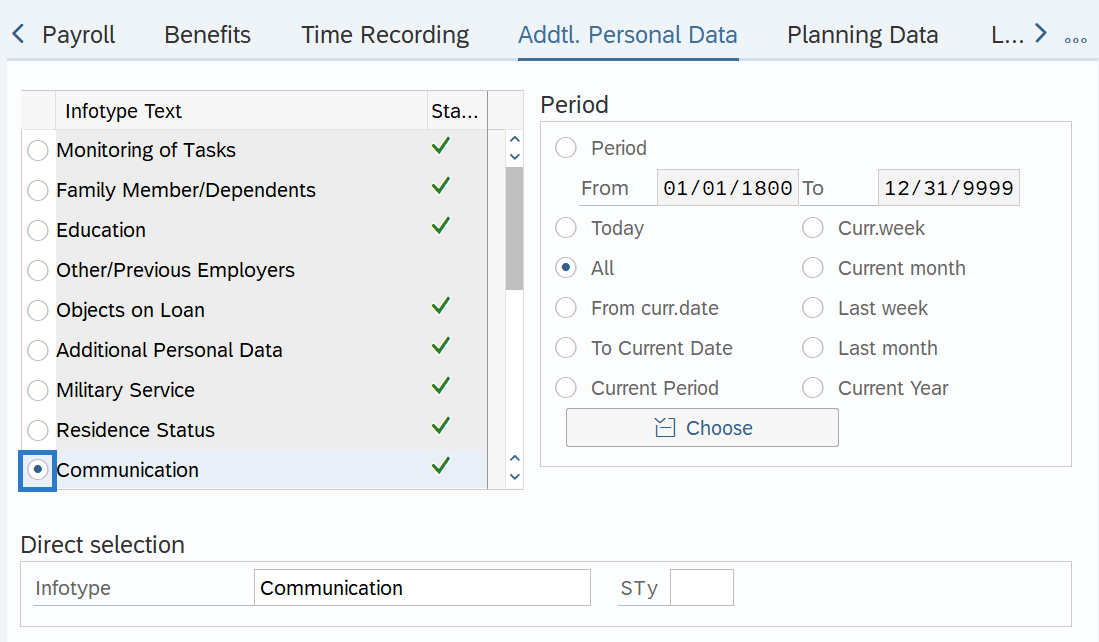
Step 6
On the Addtl. Personal Data Tab, select the Communication radio button.
-
Step 7
Click the Overview button.
-
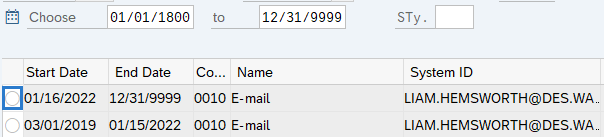
Step 8
Click the box to the left of the E-mail record with the erroneous Start Date.
-
Step 9
Click the Delete button.
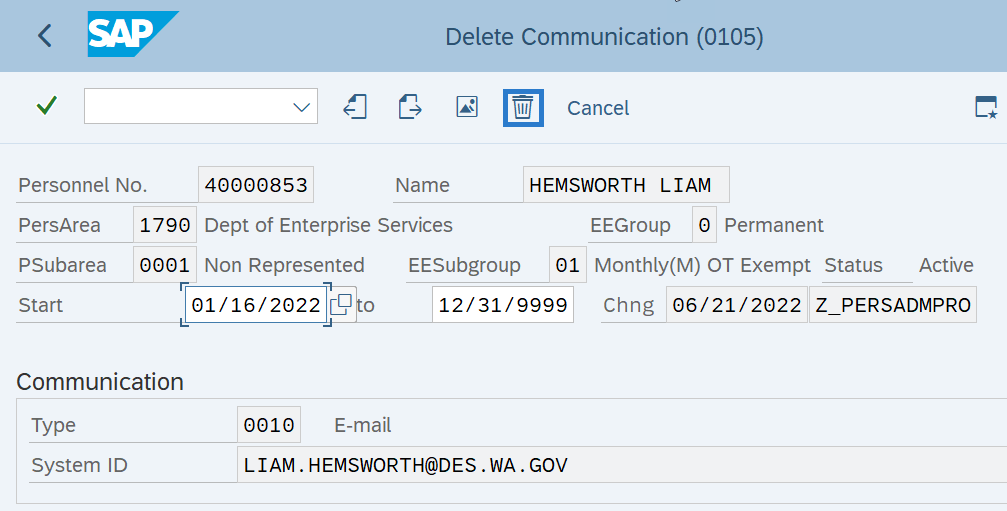
-
Step 10
Click the Delete button.
TIPS:After clicking Delete, you will be taken back to the Addtl. Personal Data tab.
-
Step 11
On the Addtl. Personal Data tab, select the Telework/Flex Work (Employee) radio button.
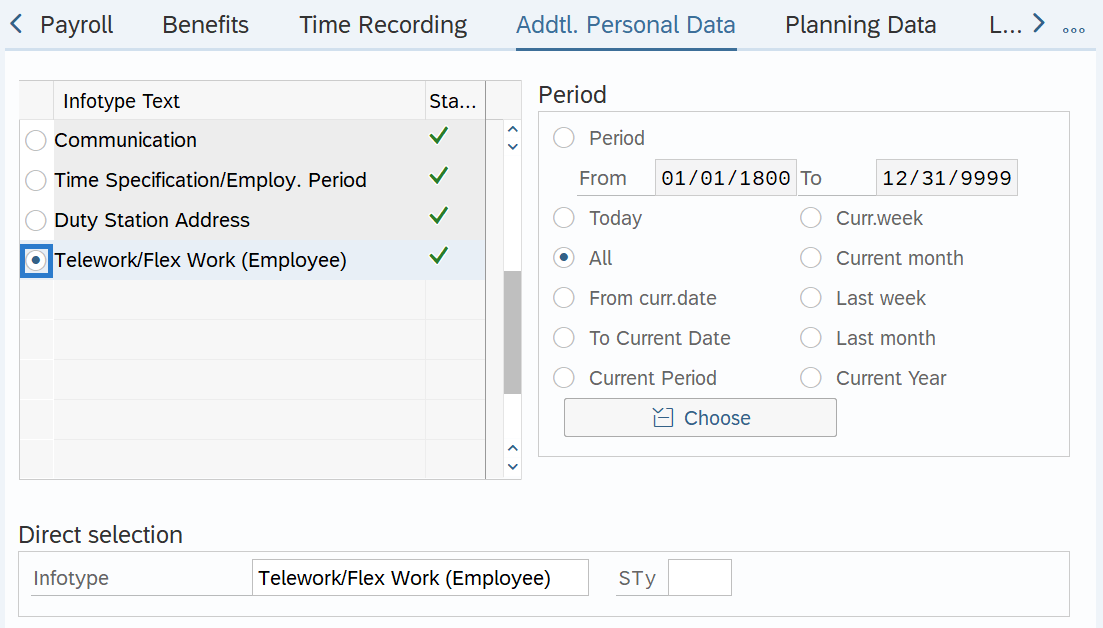
-
Step 12
Click the Overview button.
-
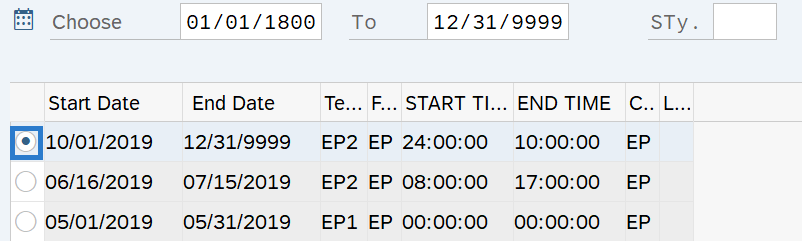
Step 13
Select the Telework/Flex Work (Employee) record radio button with the erroneous Start Date.
-
Step 14
Click the Delete button.
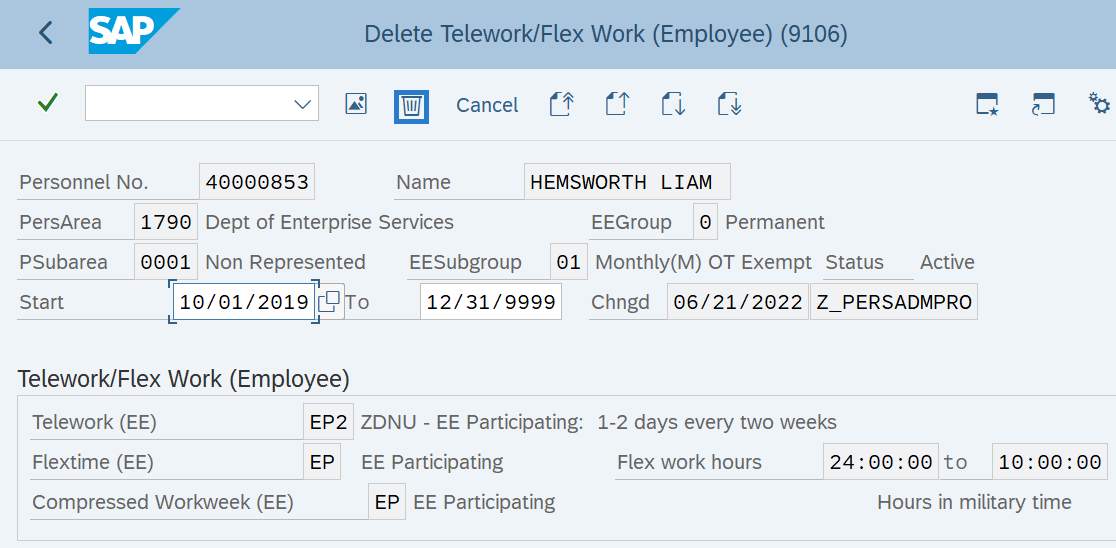
-
Step 15
Click the Delete button.
TIPS:After clicking delete, you will be taken back to the Addtl. Personal Data tab.
-
Step 16
On the Basic Personal Data Tab, select the Date Specifications radio button.
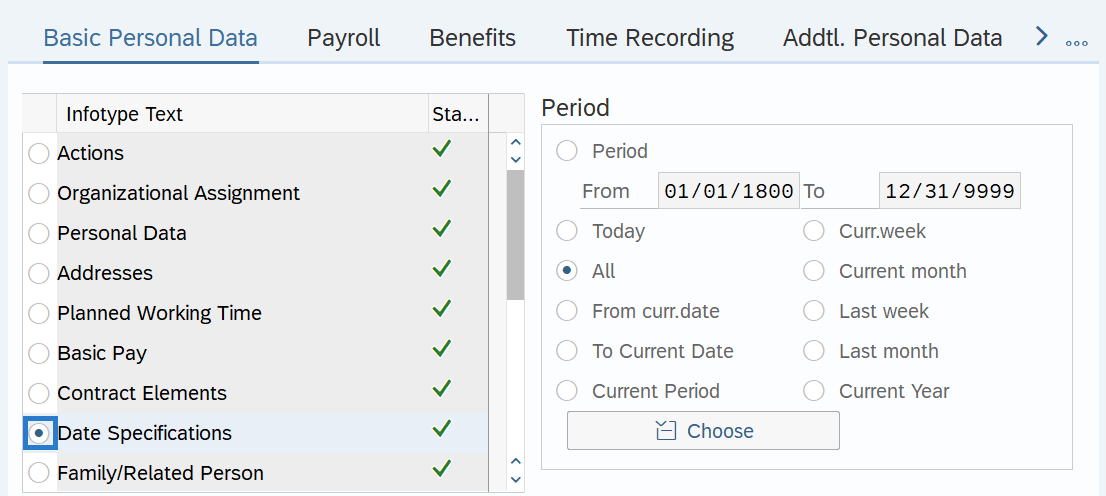
-
Step 17
Click the Overview button.
-
Step 18
Select the record prior to the Rehire Record radio button.
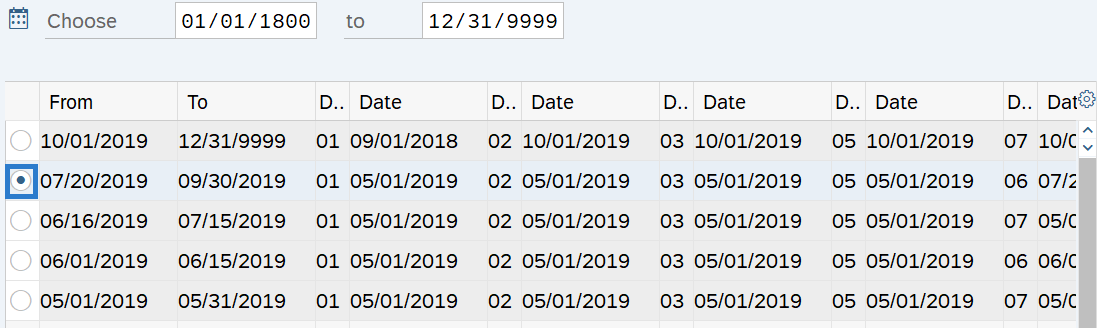 TIPS:
TIPS:During the Rehire Action, a new Date Specifications record was created. By selecting and extending the prior record, HRMS will delete the record created during the Rehire Action (see Tip in Step 21).
-
Step 19
Click the Change button.
-
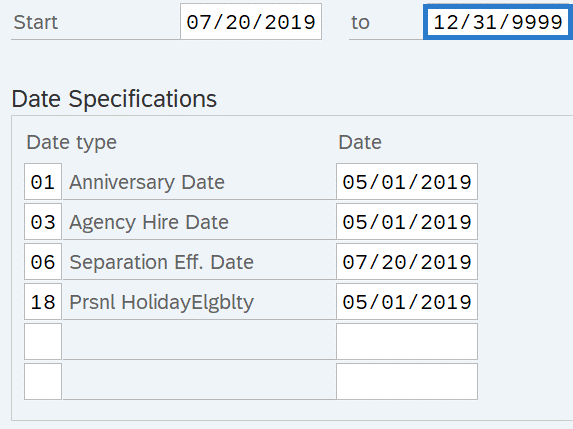
Step 20
Update the To date to 12/31/9999.
-
Step 21
Click the Enter button to validate the information.
TIPS:Message will appear at bottom of screen.

-
Step 22
Click the Save button
-
Step 23
Click the Back button to return to Basic Personal Data Tab.
-
Step 24
On the Basic Personal Data tab, select the Actions radio button.
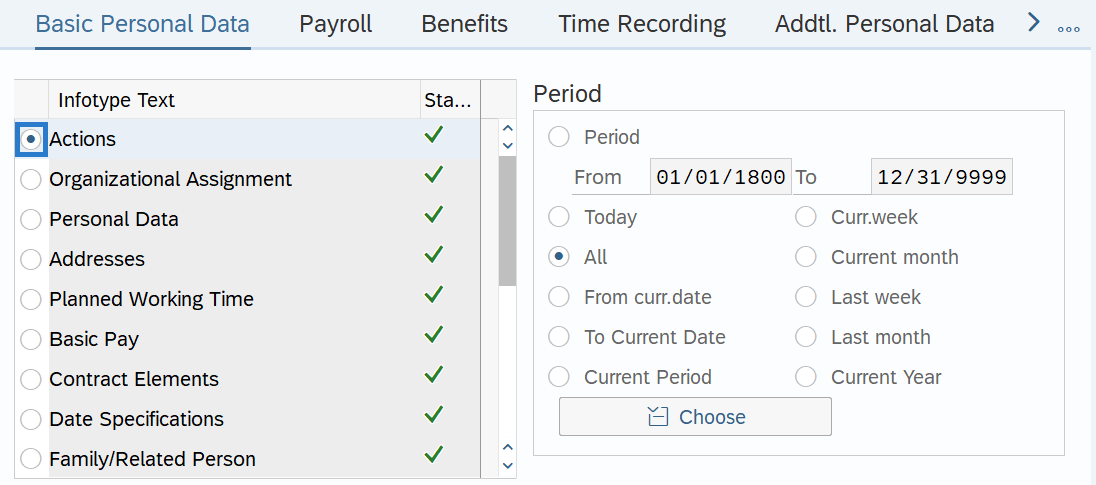
-
Step 25
Click the Overview button.
-
Step 26
Select the Rehire record with the erroneous start date radio button.
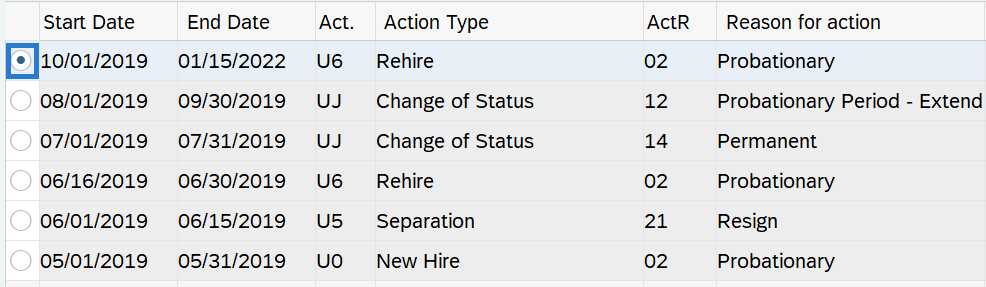
-
Step 27
Click the Delete button.
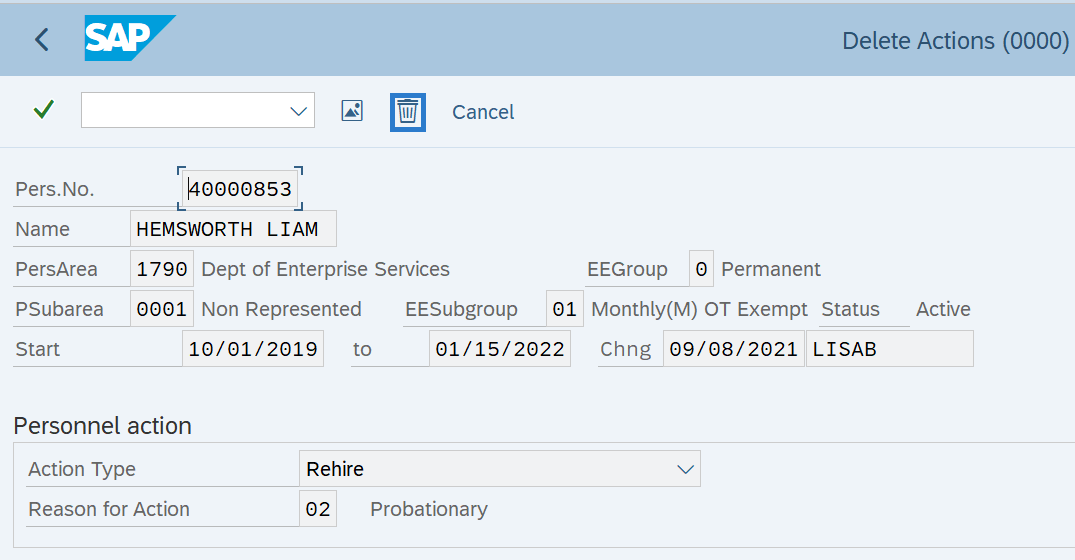
-
Step 28
Click the Delete button.
TIPS:Message(s) will appear at bottom of screen.


-
Step 29
Click the Back button to return to Basic Personal Data Tab.
-
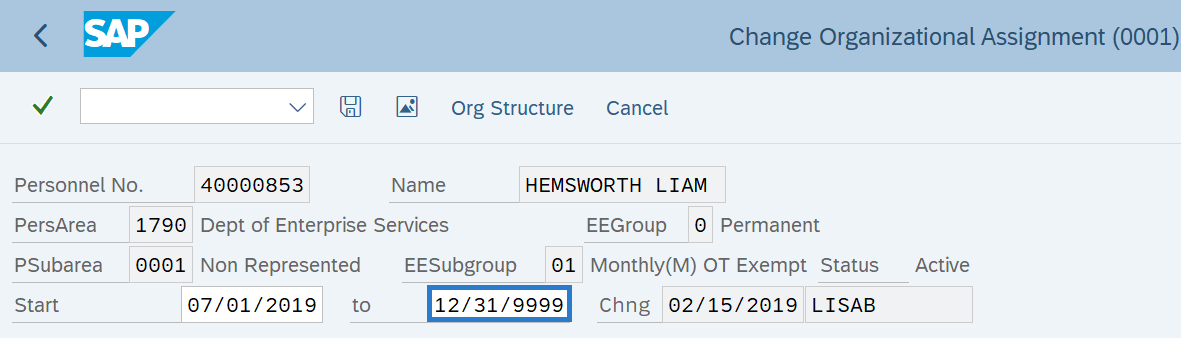
Step 30
On the Basic Personal Data tab, select the Organizational Assignment radio button.
-
Step 31
Click the Overview button.
-
Step 32
Select the record prior to the rehire record radio button.
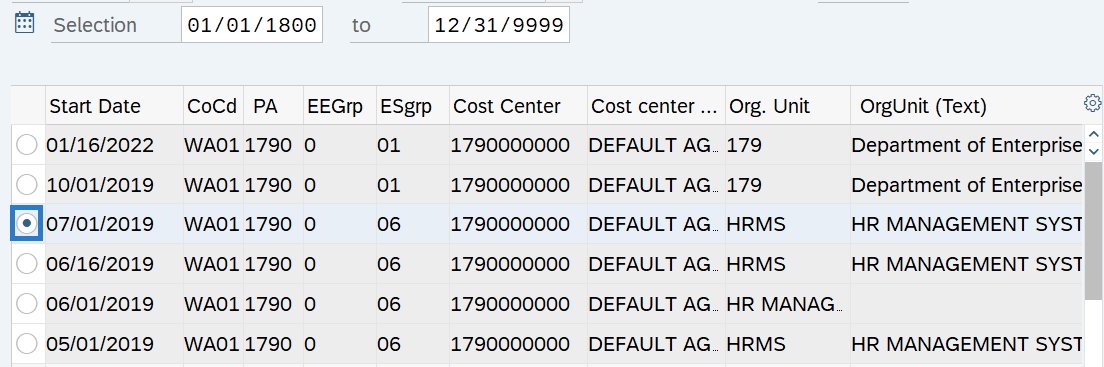
-
Step 33
Click the Change button.
-
Step 34
Update the To date to 12/31/9999.
-
Step 35
Click the Enter button to validate the information.
-
Step 36
Click the Save button.
TIPS:Message will appear at bottom of screen.

Verify that the position relationship created with the Rehire Action has been removed in PO13D. If the position to person relationship still exists in PO13D, contact the organizational management processor to assist in manually removing it.
-
Step 37
Follow the Rehire Action (PA) - Create Rehire Action procedure to enter a new Rehire Action with the correct rehire date for the employee.