Planned Working Time - Change Existing Record
Use this procedure to make a correction to an existing Planned Working Time (0007) infotype record.
Changes to an employee’s Work Schedule Rule may also necessitate changes to their telework, flextime, or compressed workweek status. If so, refer to the Telework/Flex Work (Employee) procedures.
Be sure to communicate with your payroll processor before entering retroactive changes to an employee's Planned Working Time (0007) infotype record.
A change to this infotype may result in changes to how hours worked and leave taken are processed for the employee, or result in a change to the employee's benefits eligibility. Be sure to communicate these changes to your payroll, benefits, and time and attendance processors.
-
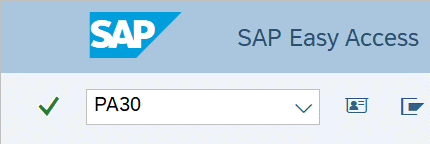
Step 1
Enter transaction code PA30 in the command field and click the Enter button.
-
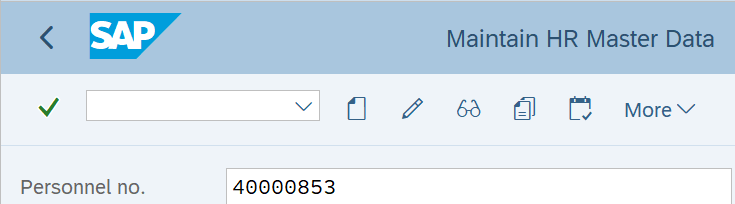
Step 2
Complete the following fields:
- Personnel no.
-
Step 3
Click the Enter button to populate the employee information.
-
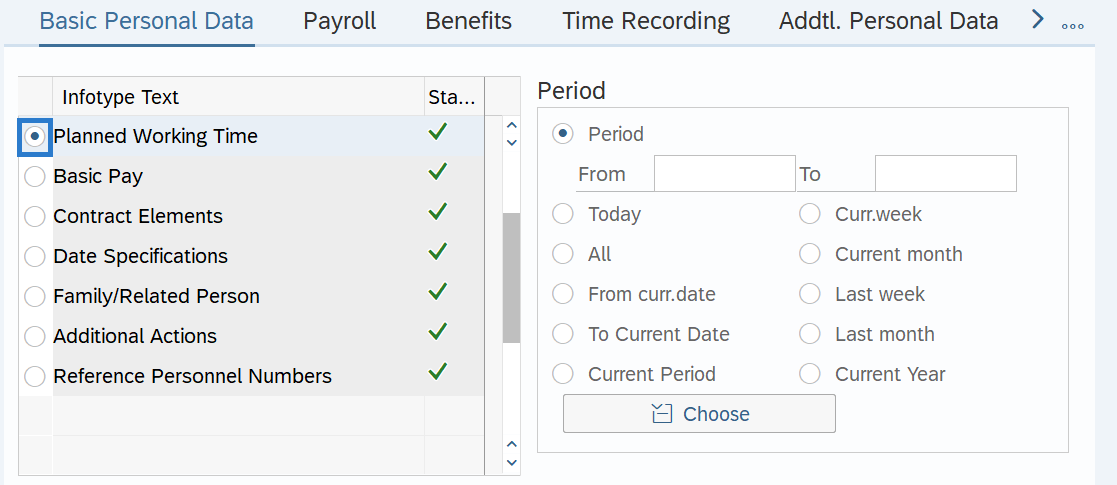
Step 4
On the Time Recording tab, select the Planned Working Time radio button.
-
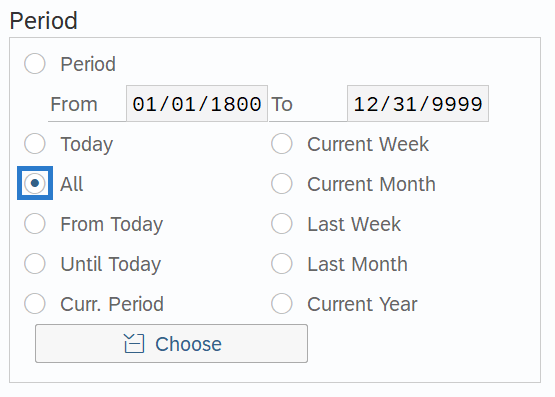
Step 5
In the Time period section, select All.
-
Step 6
Click the Overview button.
-
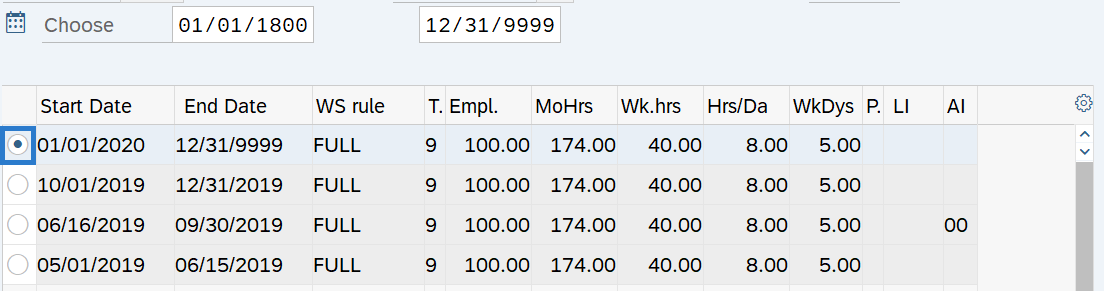
Step 7
Select the incorrect record.
-
Step 8
Click the Change button.
TIPS:Using the Change button overwrites the existing record and should only be used when making corrections.
-
Step 9
Verify the Start and To dates.
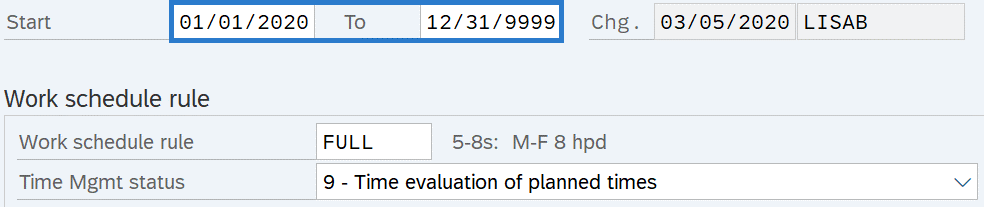 TIPS:
TIPS:In most cases, the start and to dates should remain the same. Changing the start or to dates will delete the record being updated.
-
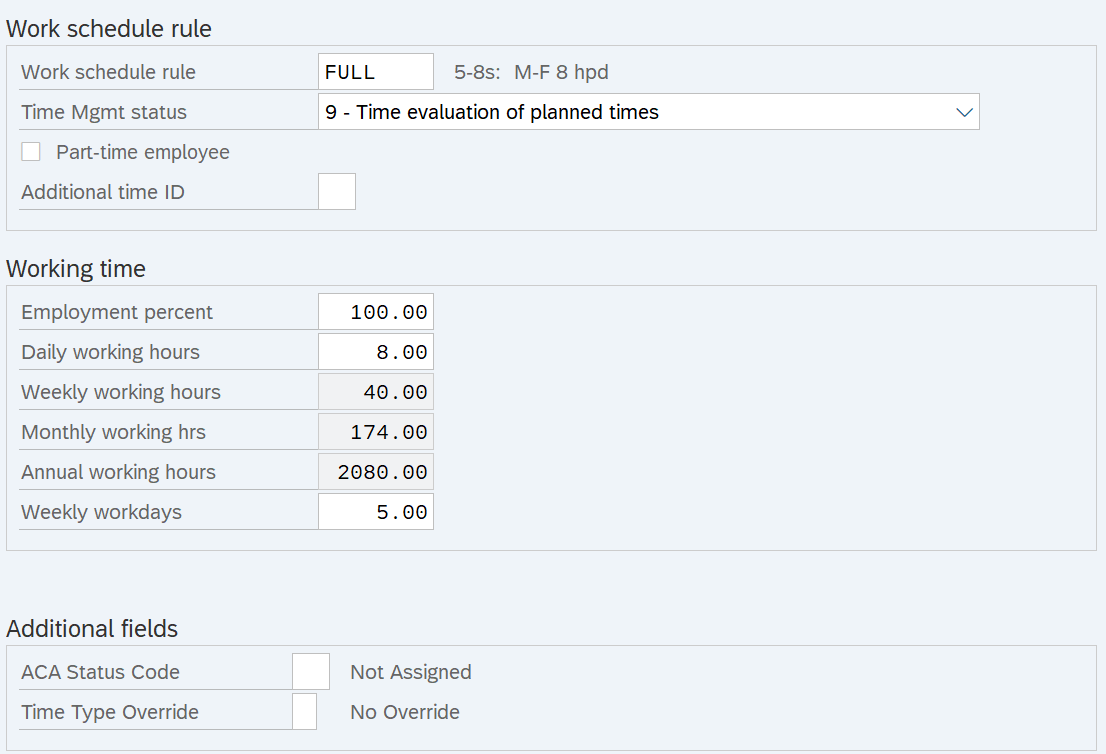
Step 10
Make the necessary corrections to the Planned Working Time (0007) field(s).
-
Step 11
Click the Enter button to validate the information.
-
Step 12
Click the Save button.