Telework/Flex Work (Employee) - Create New Record
Use this procedure to create a new Telework/Flex Work (Employee) (9106) infotype record for an employee. Creating a new record is necessary when the employee does not have an active infotype record or when the employee has an existing infotype record but you do not want to copy over the existing data fields.
Employees should have an active Telework/Flex Work (Employee) record. Refer to the HRMS Data Definitions Resource Guide for more information on how this data is used.
-
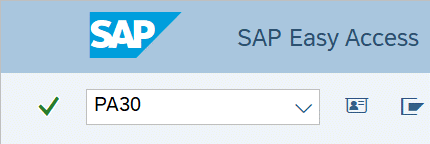
Step 1
Enter transaction code PA30 in the command field and click the Enter button.
-
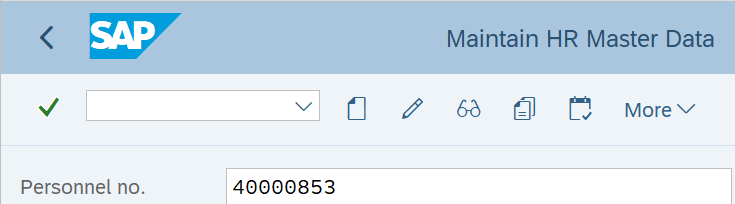
Step 2
Complete the following fields:
- Personnel no.
-
Step 3
Click Enter to populate the employee information.
-
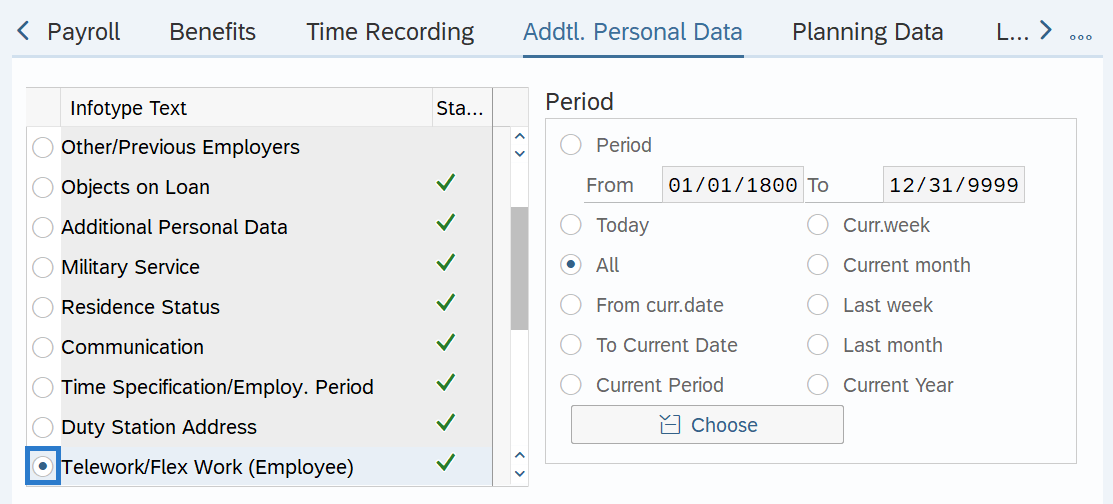
Step 4
On the Addtl. Personal Data tab, select the Telework/Flex Work (Employee) radio button.
-
Step 5
Click the Create button.
-
Step 6
Complete the following fields:
The following fields are mandatory:
- Start
- To
The following fields are conditional:
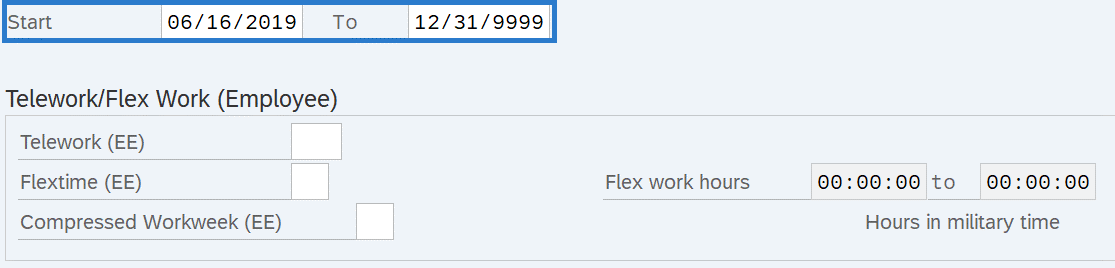 TIPS:
TIPS:Enter the employee's participation in the Telework (EE), Flextime (EE), and Compressed Workweek (EE) fields. Do not leave these fields blank. If the employee is not participating, then use the Not Participating (NP) selection value instead of blank.
Completing the Flex work hours is optional. HRMS automatically converts entries to the Flex work hours fields to “German Standard” Military Time. If you have someone whose start or end time is midnight, use “24:00:00” rather than 12:00 am. If 12:00 am is entered, it will default to 00:00:00 and you must overwrite the default value with “24:00:00”.

-
Step 7
Click the Enter button to validate the information.
-
Step 8
Click the Save button.