Sick Leave Buyout - Create Sick Leave Buyout Forms
Use this procedure to create Sick Leave Buyout forms for eligible employees who have opted-in.
Prior to using this procedure, you should have already:
- Determined eligibility
- Contacted eligible employees for opt-in/opt-out options
- Received confirmation from employees who have elected to opt-in
Follow the Sick Leave Buyout - Determine Eligibility user procedure if these steps have not yet been completed.
This process does not apply to agencies that do not maintain leave activity in HRMS. If your agency does not maintain leave activity in HRMS, follow the Sick Leave Buyout - Reporting Only Agency Blank Sick Leave Buyout user procedure instead.
-
Step 1
Enter transaction code ZHR_RPTPY681 in the command field and click the Enter button.

-
Step 2
Complete the Period section.
The following fields are mandatory:
- Other Period (Radio Button)
- Period (Start Date)
- Period To (End Date)
 TIPS:
TIPS:Period date should be the first day of the buyout year.
Period To date should be the last day of the buyout year.
-
Step 3
Complete the Date Selection section.
The following field is mandatory:
- Form Return Date
 TIPS:
TIPS:Using 01/31 of the year following the reporting year is recommended. For example, if the reporting year is 2018, you will enter 01/31/2019.
-
Step 4
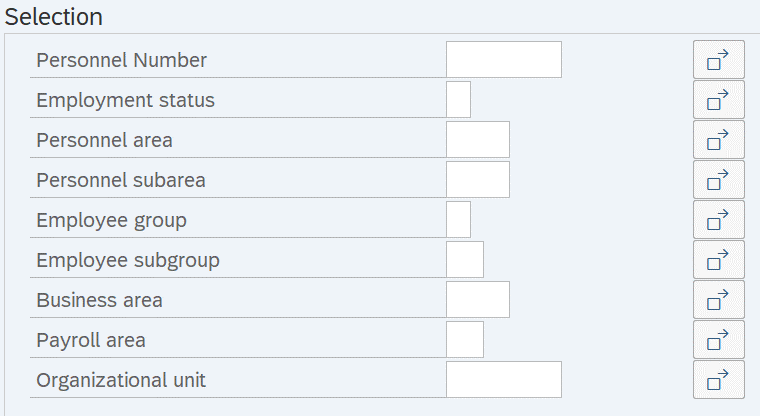
Complete the Selection section.
The following fields are recommended:
- Personnel Number
If you are creating Sick Leave Buyout forms for multiple employees, proceed to Step 5.
If you are creating a Sick Leave Buyout form for only one employee, enter their personnel number in the Personnel Number field and skip Steps 5-8.

-
Step 5
Highlight and copy the Personnel Numbers of eligible employees who opted-in from the Excel spreadsheet you created in the Sick Leave Buyout - Determine Eligibility user procedure:

-
Step 6
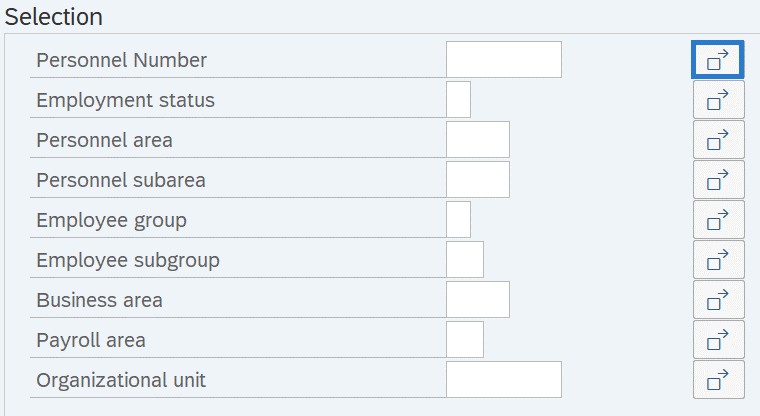
Click the Multiple Selection box to the right of Personnel Number.

-
Step 7
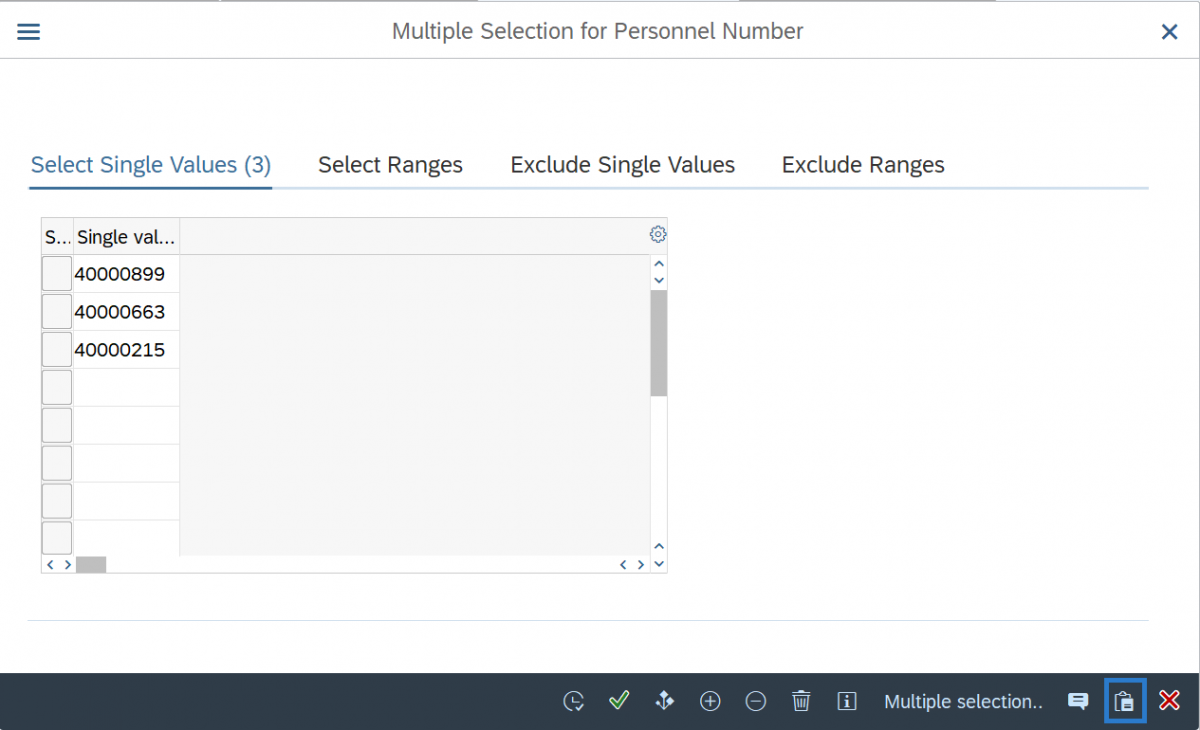
Click the Upload from Clipboard button to import the Personnel Numbers.

-
Step 8
Click the Copy button.
TIPS:The Personnel Number field will only list the initial Personnel Number from your list, however the Multiple Selection indicator will be green and the remainder of the Personnel Numbers will be included as well.
-
Step 9
Complete the Processing Options section.
Select the following radio button:
- Generate PDF and Show List

-
Step 10
Click the Execute button.
-
Step 11
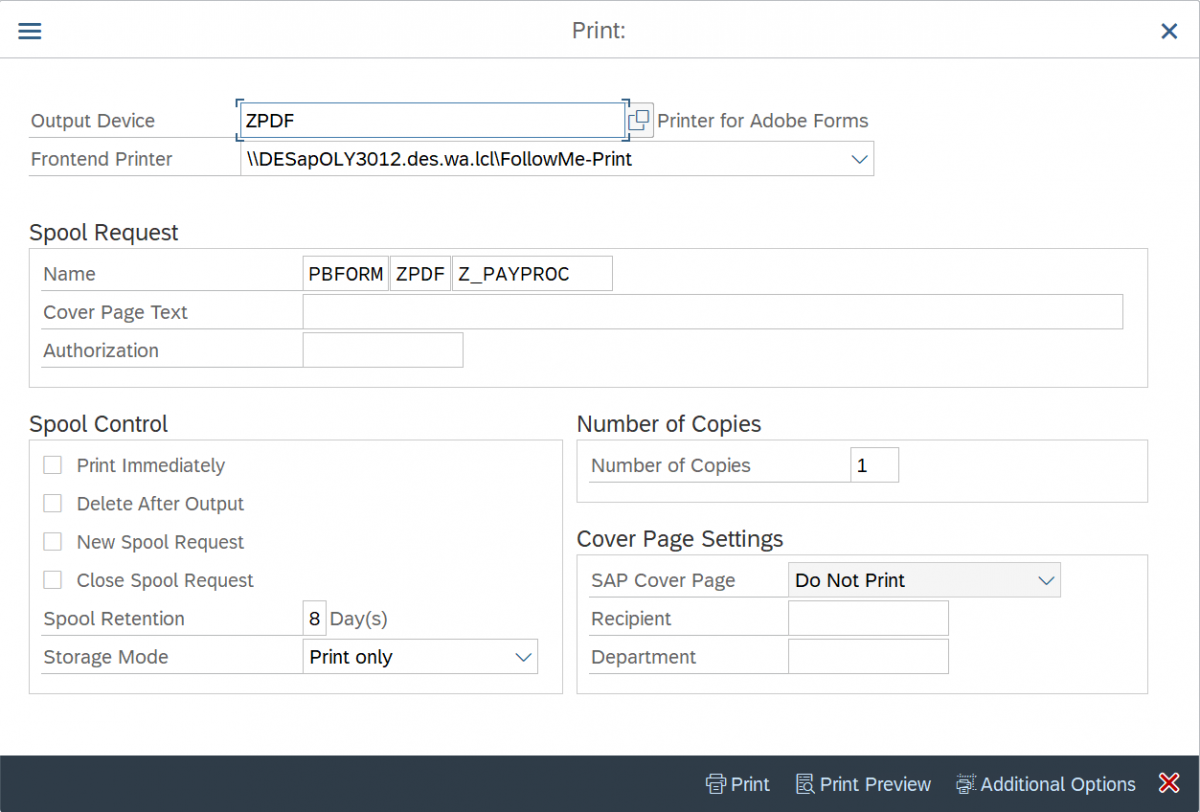
Verify the printer you wish to use defaults into the Frontend Printer field or select a different printer if needed.
 TIPS:
TIPS:Do not remove “ZPDF” from the Output Device field. This selection enables the creation of the PDF form.
-
Step 12
Click the Print button.
TIPS:If you will be sending your printing/mailing to Department of Enterprise Services, select the Print Preview button. Once the PDFs are populated, click the Save button.
If your agency will be sending printing/mailing to Department of Enterprise Services, coordinate with them by email at PrintCSR@des.wa.gov or by phone at (360) 664-4343.
If this is the first time you are printing the Sick Leave Buyout form, you will be required to click “Allow” in one or more message windows.
Select “Remember My Decision” to eliminate future recurrence of this pop-up.
-
Step 13
Distribute the Sick Leave Buyout Forms to employees and receive the signed forms back from those who opted-in.
