Addresses - Copy and Update Record
Use this procedure to copy an existing Addresses (0006) infotype record and update it with necessary changes. Using the Copy action will retain the history of the previous record.
In order to process payroll, employees must have an active Permanent residence address in the Addresses (0006) Infotype.
Employees working outside of the state of Washington require an Out of State Work Location address record.
Addresses entered into HRMS are sent to HCA and DRS through their regularly scheduled data files (interfaces).
Mail from HRMS, HCA, and DRS is sent to the Mailing address if one exists, and if no Mailing address exists then it is sent to the Permanent residence address.
It is appropriate for an agency to update an address for a separated employee. This will ensure the employee will receive a W-2 and any other necessary mailings.
W-2 address update requirements change each year. If address updates are needed, an address should be effective on or before December 31 of the previous year. Processors should refer to the current Year End Schedule to identify the date OFM will begin processing W-2s for the cutoff related to the address update. Updates must be made prior to the initiation of W-2 processing. For example, If the Year End Schedule identifies “Start statewide W-2 processing” on January 8, processors must complete the update no later than January 7 and the record Start date is December 31 of the previous year.
-
Step 1
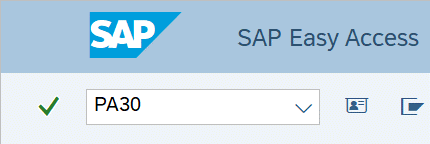
Enter transaction code PA30 in the command field and click the Enter button.
-
Step 2
Complete the following fields:
- Personnel no.

-
Step 3
Click the Enter button to populate the employee information.
-
Step 4
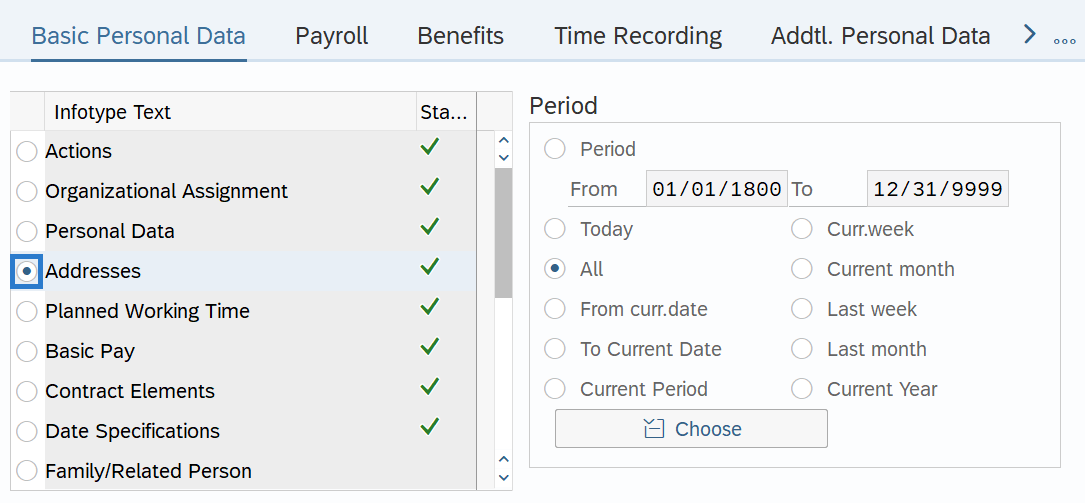
On the Basic Personal Data tab, select the Addresses radio button.
-
Step 5
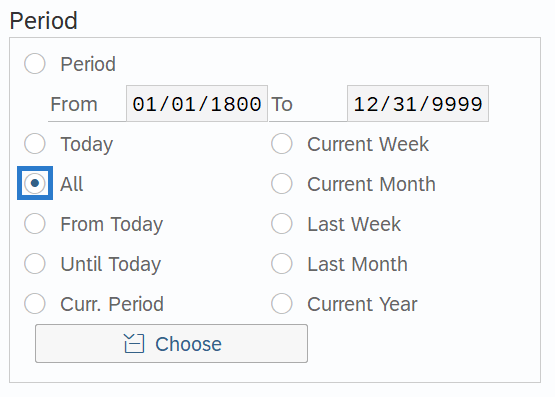
In the Time period section, select All.
-
Step 6
Click the Overview button.
-
Step 7
Select the record you wish to copy.
 TIPS:
TIPS:STy 1 is Permanent residence
STy 5 is mailing address
STY 9 is Out of State Work Location
All employees must have a Permanent residence address.
Employees working outside of the state of Washington require an Out of State Work Location address record.
-
Step 8
Click the Copy button.
-
Step 9
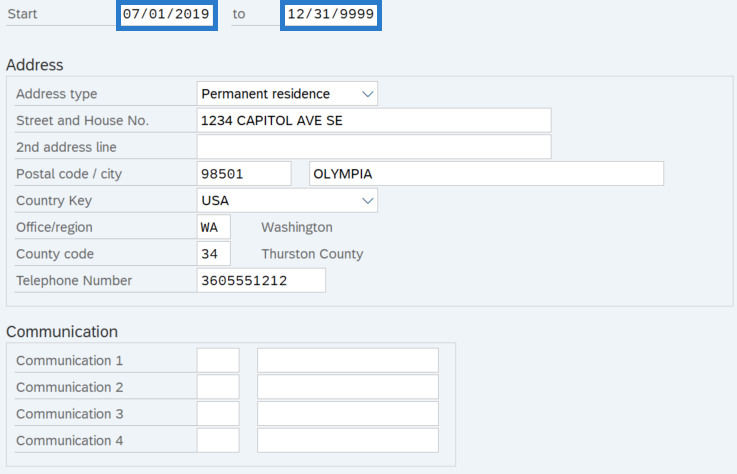
Enter the appropriate Start and To dates.
 TIPS:
TIPS:When using the Copy button, the Start Date will populate with the date of the existing record. Be sure to enter the new Start date to keep the history of the existing record. The new, active record should have an end date of 12/31/9999.
For employees who receive warrants by mail, when payroll processes (payroll Day 3) HRMS will use the address that is effective the last day of the pay period. Address changes keyed after Day 3 or with an effective date after the last day of the pay period will not be reflected until the following pay period. Ensure the employee's address is correct for mailing their warrant. Address updated entered after Day 3 or with an effective date on or after the last day of the pay period will not be reflected until the following pay period.
-
Step 10
Enter the necessary changes to the record:
The following fields are mandatory:
- Address type
- Street and House No.
- Postal Code
- City
- Country Key
- Office/Region
- County Code
The following fields are optional:
- 2nd Address Line
- Telephone Number
- Communication 1
- Communication 2
- Communication 3
- Communication 4
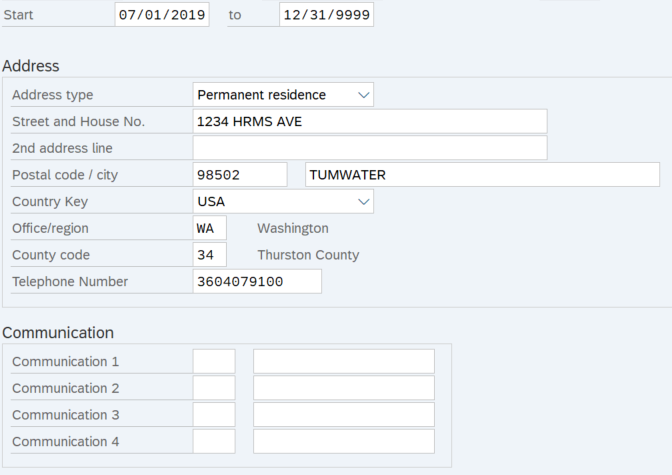 TIPS:
TIPS:Telephone Numbers and Communication selection fields should contain only the 10 digit area code and telephone number. Special characters and additional numeric values will be removed by HRMS prior to saving.
The address fields will allow the following characters:
- Entire alphabet – upper and lower case
- Numeric values – 0123456789
- Special characters - * ` % & - ! , . : ; / ( ) “ ‘ # and space
If the employee receives a warrant by mail, ensure the address that is active on Day 3 of payroll processing is the correct address.
It is recommended that you use USPS Address Lookup Tool to ensure addresses are entered correctly.
Do not enter out of country addresses for Permanent residence or Mailing Address types; it may cause redlines or other errors. If the employee lives out of country, it is recommended that the Permanent Residence or Mailing address records reflect either:
- The agency address is entered and the agency then mails all items to the employee's out of country address as necessary; OR
- The employee selects an address to use within the US, such as a family member or friend who is willing to forward their mail to their out of country address.
Out of country addresses can be entered for an Out of State Work Location address type.
Employees working outside of the state of Washington require an Out of State Work Location address record.
Ensure you are using the correct County Codes:
- Permanent Residence and Mailing Address require a 2-digits County Code. If an out of state address is created for Permanent Residence and Mailing Address the county code should be entered as 40-Out of State.
- Out of State Work Location address types require a 3-Digit County Code.
Be aware that Pay1 permanent residence address lines have shorter character limits than HRMS. HRMS will allow up to 35 characters in Address Lines 1 and 2, while Pay1 will only allow 30. Consider limiting the HRMS address to 30 characters so the complete address can be transferred to Pay1.
-
Step 11
Click the Enter button to validate the information.
-
Step 12
Click the Save button.
TIPS:Be sure to communicate with your payroll processor if the employee lives or works outside of the state of Washington.
