Separation Action (PY) - Create Separation Action for Deceased Employee
Use this procedure to complete the payroll portion of a separation action for a deceased employee. The personnel administration portion of the Separation Action must be completed first.
As a payroll processor, you will not process the following steps until you have received a separation information packet from the personnel administration processor indicating they have completed their portion of the action. In addition to the PA40 transaction, this procedure will walk through necessary updates using the PA30 transaction that are specific to deceased employees.
Work with your personnel administration processor and your time and attendance processor to confirm that all the items listed below were completed before starting the Separation Action (PA40).
- Deleted any future-dated time, compensation, and leave entries (including the effective date of the action and beyond) from CATS, the Employee Remuneration Info (2010) infotype, and the Absences (2001) infotype.
- Manually generated leave accruals if the employee has earned leave but is separating before the system generates their last accruals. Refer to the Quotas Generate Accruals Manually user procedure.
- Executed ZT60 and ZCAT6 to ensure the employee has accurate leave accruals with correct end dates.
Refer to the Deceased Employee procedure and documents located on the OFM Statewide Accounting Payroll Resources website for additional forms and procedures.
Caution: DO NOT release payment to the claimant until all requirements in the State Administrative and Accounting Manual (SAAM) has been met. Refer to SAAM 25.70.30.
If the employee has separated from state service prior to the completion of six continuous months and has accrued vacation leave, the accrued amount will need to be removed. Refer to the Quota-Removing Accrued Leave procedure.
This procedure may require hand-offs to the other roles (such as benefits processor) depending on the structure of your agency and your role at your agency. Refer to the Separation Action (BN) - Create Separation Action procedure for completing those portions of the action.
-
Step 1
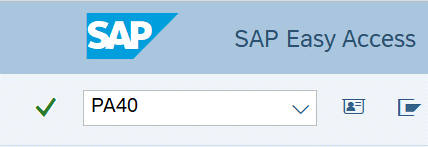
Enter transaction code PA40 in the command field and click the Enter button.
-
Step 2
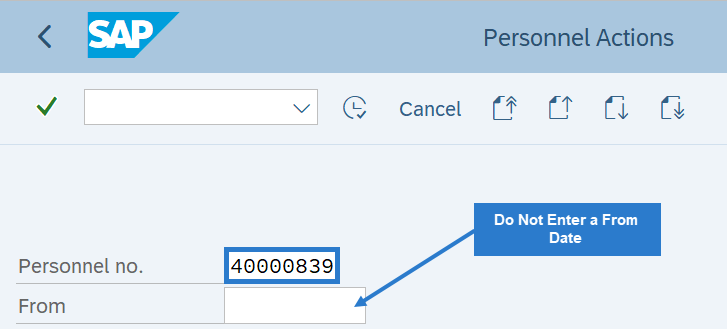
Complete the following field:
- Personnel no.
 TIPS:
TIPS:Do not enter a From date on the Personnel Actions screen.
-
Step 3
Click Enter to populate the employee information.
-
Step 4
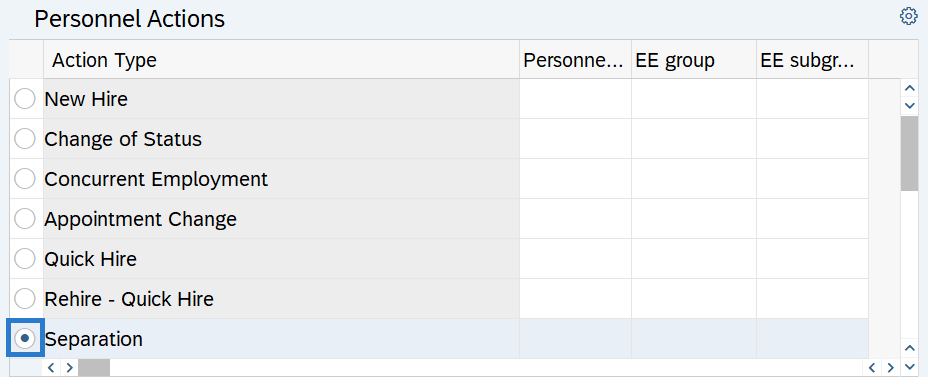
Select the Separation radio button.
-
Step 5
Click the Execute button to begin the transaction.
-
Step 6
Verify the Actions (0000) infotype contains the correct action you need to execute.
-
Step 7
Click the Execute info group button.

-
Step 8
Click the Enter button.

-
Step 9
Click Continue in the Execute info group dialog box.
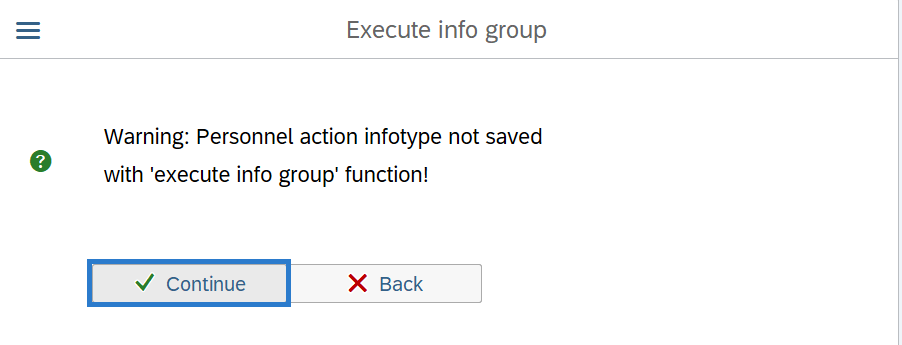 TIPS:
TIPS:This infotype was already saved and it is okay to continue.
-
Step 10
Complete the Delimit Recurring Payments/Deductions (0014) infotype.
The following field is mandatory:
- Delimit.Date
 TIPS:
TIPS:The Delimit Date allows you to set an end date for a record establishing when it will no longer be valid. Delimited records are retained as a historical record.
Verify the Delimit Date. The wage type record(s) should end on the last day of the pay period (the 15th or the last day of the month). The system will end date the record one day before the delimit date.
Example: if the employee's date of death is during the period 04/16/2019 - 04/30/2019, the record should end on 04/30/2019. Enter a delimit date of 05/1/2019.
-
Step 11
Click the box(s) to the left of the wage type records to be delimited.
 TIPS:
TIPS:You can select more than one record to delimit.
-
Step 12
Click the Delimit button.
-
Step 13
Click the Next Record button until you reach Subtypes for infotype Time Quota Compensation window.
-
Step 14
Select the appropriate Compensation method in the Subtypes for infotype Time Quota Compensation window and click Enter.
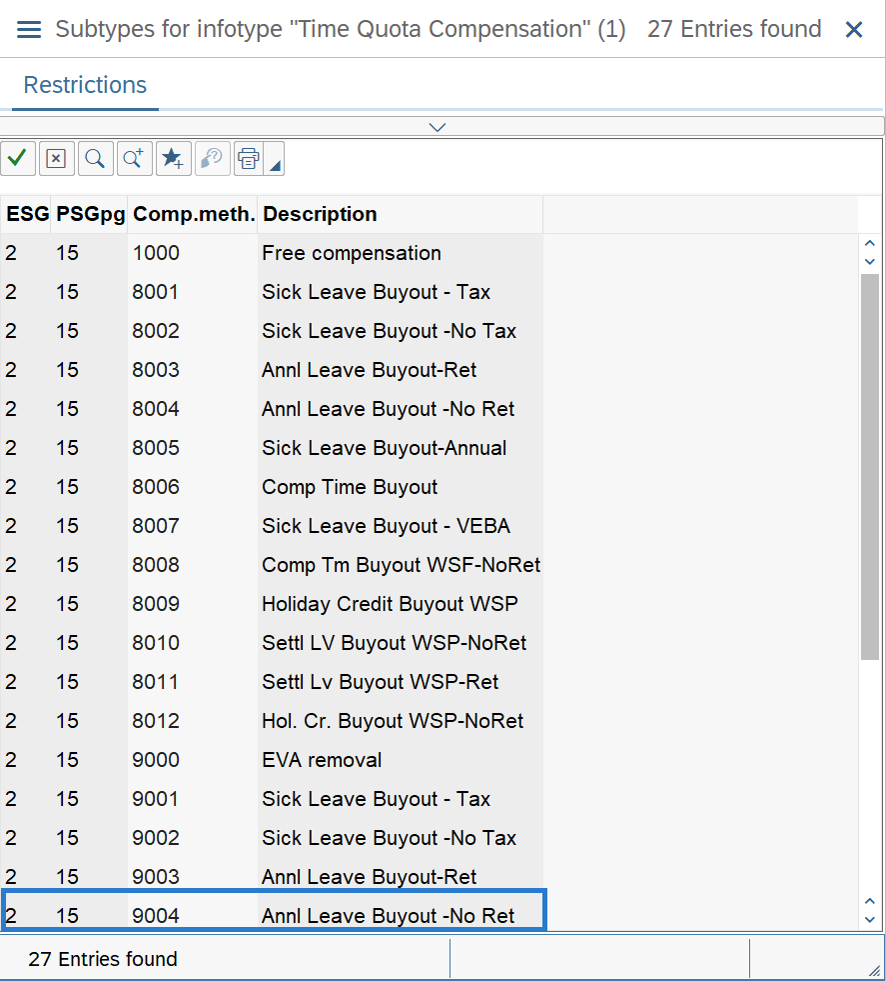 TIPS:
TIPS:The compensation method 9003 (Annl Leave Buyout-Ret) should be used for Plan 1 employees. Leave buyout information to PERS Plan 1, TRS Plan 1, and WSPRS Plan 1 members commissioned prior to July 1, 2001 should only be reported to DRS up to 240 hours. The remaining hours are not reportable to DRS.
The compensation method 9004 (Annl Leave Buyout-No Ret) should be used for Plan 2, Plan 3, and any hours over 240 for Plan 1 employees.
If an incorrect infotype is created, the buyout will be reported to DRS and will need to be deleted.
-
Step 15
Complete the Time Quota Compensation (0416) infotype.
The following fields are mandatory:
- Start
- No. to compensate
The following field is conditional:
- Do not account
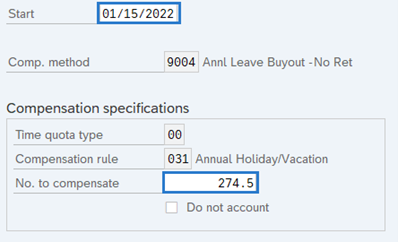 TIPS:
TIPS:The Start date is the employee’s date of death.
No. to compensate is the number of hours or days of a quota type for the time quota compensation.
If Do not account box is selected, the employee will not be compensated for the leave buyout and the quota will be reduced.
When reducing hours for the employee’s Personal Holiday, use quota compensation type 1000 and check the Do not account box.
Refer to the Compensatory Time Cash-Out Payments for Terminating Employees resource document to determine whether the system-calculated regular rate or the average regular rate should be used to calculate a comp time payment.
To remove accrued vacation leave when an employee separates from state services prior to completing six continuous months of employment, follow the Quota - Removing Accrued Leave user procedure.
-
Step 16
Click the Enter button to validate the information.
-
Step 17
Click the Save button.
TIPS:Only one buyout can be processed during the Separation Action (PA40). If there are additional quota types to buyout follow the Quota - Time Quota Compensation (Buyout) procedure.
When buying out sick leave for a deceased employee, use Comp. method 9002 Sick Leave Buyout -No Tax to exempt the buyout amount from social security and medicare taxes.
Stop:This marks the end of the Separation Action using PA40. The remaining steps in this procedure will direct you to make additional updates if necessary, including returning shared leave, changing the Bank Details (0009) record to a warrant, changing Withholding Info W4/W5 US (0210) record to exempt, and creating Additional Payments (0015) to transfer funds to General Ledger 5145.
-
Step 18
Return any unused shared leave, if applicable. Refer to the following user procedures:
-
Step 19
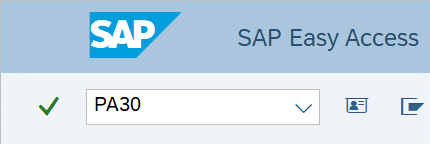
Enter transaction code PA30 in the command field and click the Enter button.

-
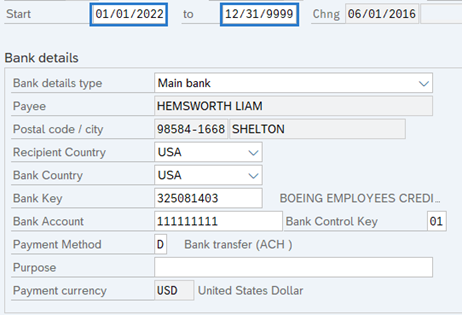
Step 20
On the Payroll tab, select the Bank Details radio button.
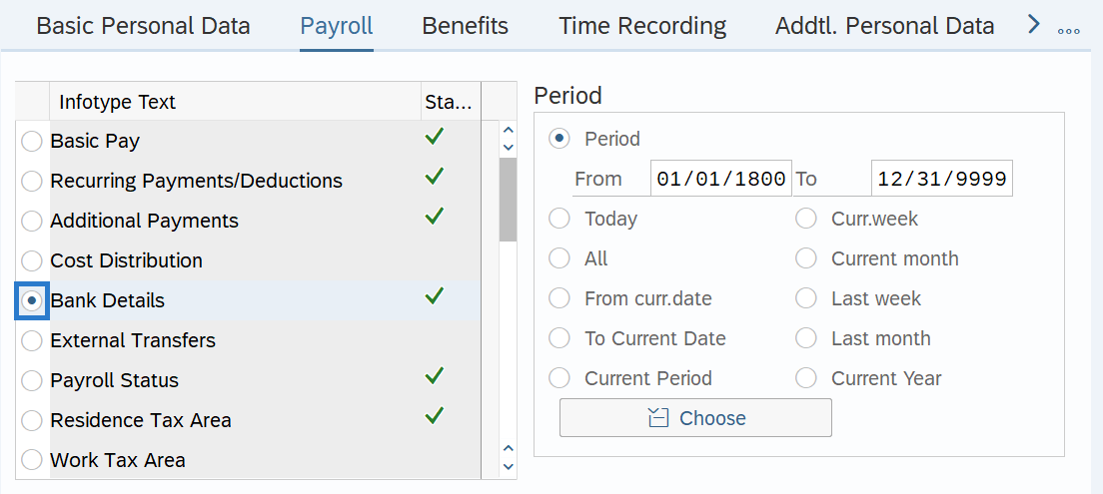 TIPS:
TIPS:If the employee’s paycheck is automatically deposited (ACH) with their financial institution, their Bank Details (0009) infotype needs to be set to warrant. This will cause a warrant to be printed for the final payment. If the employee already receives a warrant, proceed to step 25.
-
Step 21
Click the Copy button.
-
Step 22
Enter the appropriate Start and To dates.
 TIPS:
TIPS:When using the Copy button, the Start date will populate with the date of the existing record. Be sure to enter the new Start and To Dates to keep the history of the existing record. Changes to this infotype cannot be made in retro and you will receive an error if this step is missed.
The new, active record should have a Start date set as the first day of the current pay period, and the To date set to 12/31/9999.
-
Step 23
Enter the necessary changes to the record:
Delete the following fields:
- Bank Key
- Bank Account
- Bank control key
The following fields are mandatory:
- Payment Method
- C - Warrant
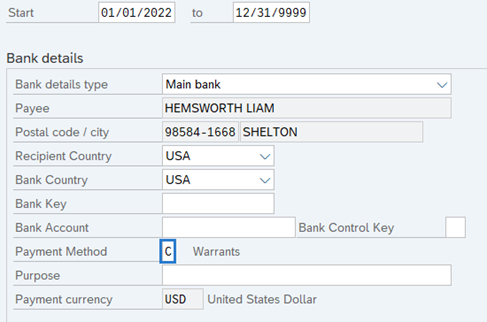 TIPS:
TIPS:Bank Details Type must be 0 Main Bank.
The Payment Method must be C - Warrant.
The Bank Key and Bank Account fields must be blank.
-
Step 24
Click the Enter button to validate the information.
-
Step 25
Click the Save button.
-
Step 26
On the Payroll tab, select the Withholding Info W4/W5 US radio button.
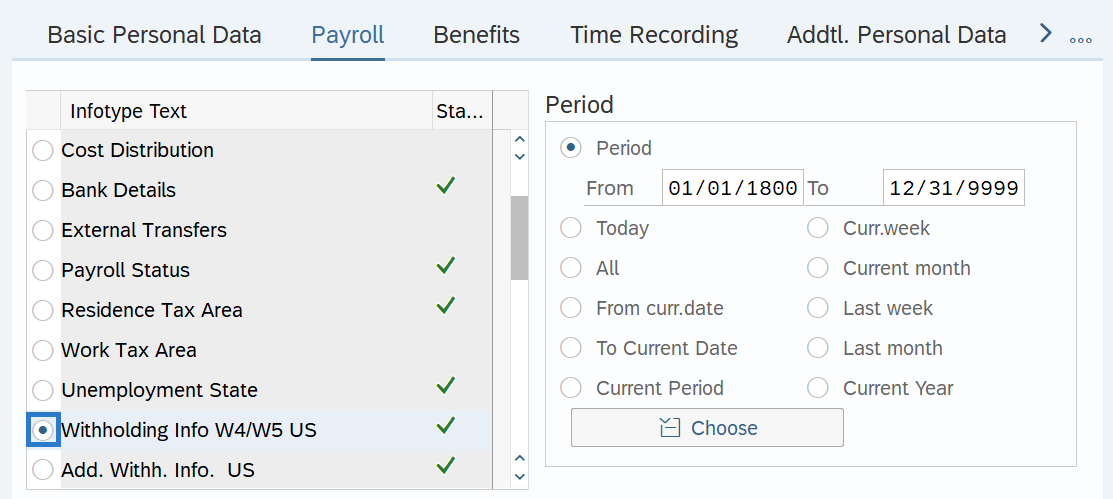
-
Step 27
Click the Overview button.
-
Step 28
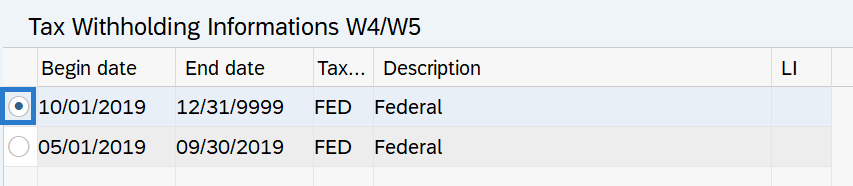
Select the current record radio button.
-
Step 29
Click on the Copy button.
-
Step 30
Complete the following fields:
The following fields are mandatory:
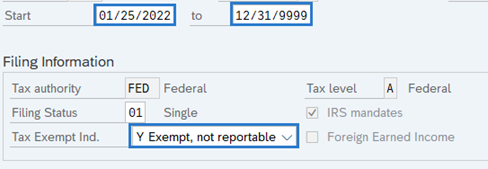
- Start
- To
- Tax Exempt Ind.
 TIPS:
TIPS:Start: Enter the day after the previous pay date. Example, if the employee passed away on 4/30/2019, you would need to enter 4/26/2019 as the Start date.
Set the Tax Exempt Ind. Field to “Y Exempt, not reportable.” This ensures any payments to the deceased employee are not subject to federal income tax withholding.
-
Step 31
Click the Enter button.
TIPS:One or two warning messages may appear:
- Exemption checkbox selected, end date should be changed to XX/XX/XXXX
- The employee is no longer with the company since XX/XX/XXXX
Click the Enter button to clear the message.
-
Step 32
Click the Save button.
TIPS:If the deceased employee was subject to Oregon or Idaho taxes, repeat steps 25 through 31 to exempt the payment from Oregon or Idaho State Income Tax Withholding if needed. If any other state or local taxes should be exempted, follow the Other Taxes - US user procedures to enter the necessary exemption(s).
-
Step 33
Run a Payroll Simulation to find the employee’s net pay (/560) for the final payment.
TIPS:Refer to the Payroll Simulation procedure.
If payment is made in the year after the date of death, you may need to establish an Other Taxes - US record using Fed Subtype to exclude the OASI and Medicare from employee and employer withholdings. Refer to the Repayment of current year wages section of IRS Publication 15 for further information.
-
Step 34
Enter transaction code PA30 in the command field and click the Enter button.
-
Step 35
Complete the following field:
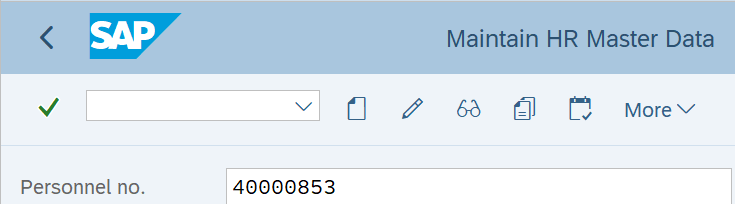
- Personnel no.
-
Step 36
Click Enter to populate the employee information.
-
Step 37
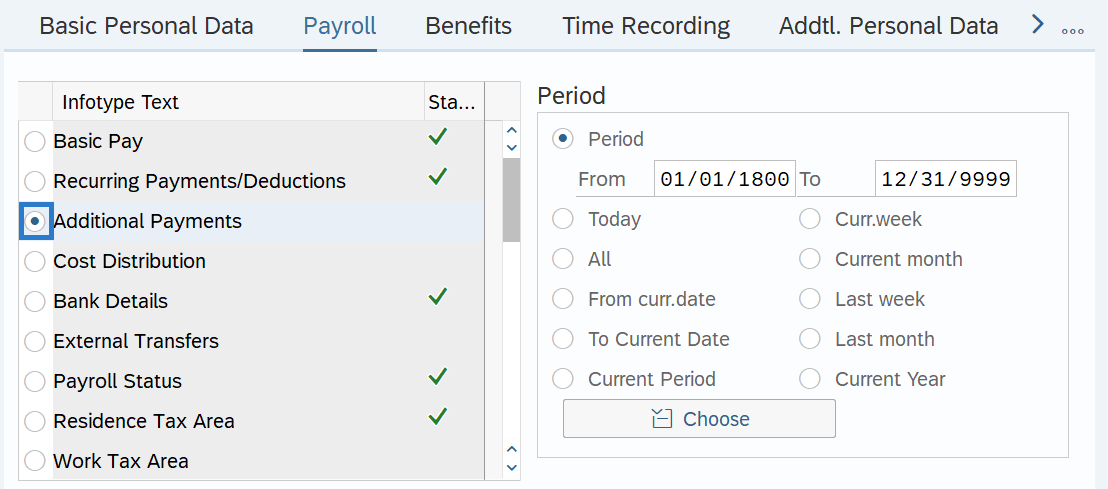
On the Payroll tab, select the Additional Payments radio button.
-
Step 38
Click the Create button.
-
Step 39
Complete the following fields:
The following fields are mandatory:
- Wage Type
- Amount
- Date of origin
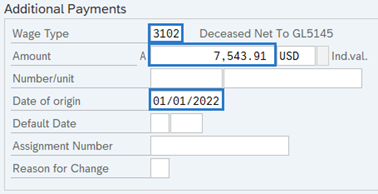 TIPS:
TIPS:Wage Type: Select from the match code or enter wage type code 3102 - Deceased NET to GL 5145.
The Amount is the payment which needs to be directed to General Ledger (GL) 5145 (Due to Deceased Employees’ Estates). This will be the net amount (/560) from the payroll simulation.
Date of origin: Enter a date within the current pay period.
-
Step 40
Click the Enter button to validate the information.
-
Step 41
Click the Save button.
TIPS:Run a Payroll Simulation to verify entries. Refer to the Payroll Simulation procedure.
Stop:For the payroll processor, this will mark the end of the Separation Action for Deceased Employee action. After saving, click the Exit button and transfer the separation packet to the benefits processor who will continue the action. The benefits processor should refer to the Separation Action (BN) - Create Separation Action to complete their portion of the action.
After the payroll process is complete (Payroll Day 4), the net pay will reside in the State Payroll Revolving Account (035), GL 5145.
Caution: DO NOT release payment to the claimant until all requirements in the State Administrative and Accounting Manual (SAAM) have been met. Refer to SAAM 25.70.30.
- You will release the payment using the Agency Financial Reporting System (AFRS), not HRMS.
- Your transaction will debit GL 5145 in Account 035.