New Hire Action (BN) - Create New Hire Action
Use this procedure to complete the benefits portion of a new hire action. The personnel administration and payroll portions of the new hire action must be completed first.
As a benefits processor, you will not process this action until you have received a new hire information packet from the payroll processor indicating they have completed their portion of the action. The personnel administration and payroll portions of the new hire action must be completed first.
The benefits portion of the new hire action walks you through creating the General Benefits Information (0171) and Savings Plans (0169) infotype records for the employee. All employees must have an active General Benefits Information (0171) infotype record. A Savings Plans (0169) infotype record is needed if the employee is in a retirement eligible position.
Before beginning this action, follow the steps in Chapter 2 of the DRS Employer Handbook to determine the employee’s eligibility for membership. If the employee has not previously had retirement benefits, they may have a 90-day window to choose a plan, and potentially a rate:
- PERS (P2 or P3) – 90 day window for plan (P2 or P3) and rate (P3 rate only)
- TRS (T2 or T3) – 90 day window for plan (T2 or T3) and rate (T3 rate only)
- PSERS (N2) – no 90 day window
- WSPRS (S2) – no 90 day window
For PERS and TRS plans, after 90 days, if the employee has not made a selection, they will be defaulted to PERS2/TRS2 within the ERA. No action is needed in HRMS.
If an employee chooses PERS3 or TRS3, benefits processors must create an updated Savings Plans (0169) infotype record using the Savings Plans – Create New Record procedure.
-
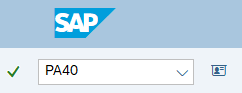
Step 1
Enter transaction code PA40 in the command field and click the Enter button.
-
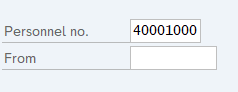
Step 2
Complete the following fields:
- Personnel no.
 TIPS:
TIPS:Do not enter a From date on the Personnel Actions screen.
-
Step 3
Click Enter to populate the employee information.
-
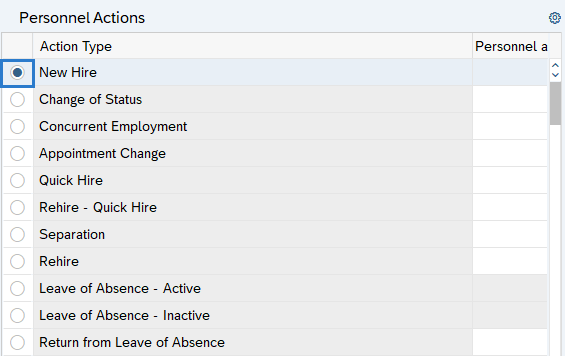
Step 4
Select the New Hire radio button.
-
Step 5
Click the Execute button to begin the transaction.
-
Step 6
Verify the Actions (0000) infotype contains the correct action you need to execute.
-
Step 7
Click the Execute info group button.

-
Step 8
Click Continue in the Execute info group dialog box.

-
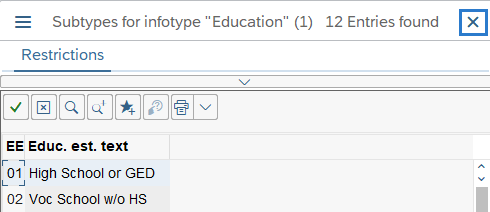
Step 9
Click the Next Record button until you reach Subtypes for infotype “Education” window.
-
Step 10
Click the Close button to by-pass Subtypes for infotype “Education” window:
-
Step 11
Continue to click the Next Record button until you reach the General Benefits Information (0171) infotype.
-
Step 12
Complete the General Benefits Information (0171) infotype.
Complete the following fields:
The following fields are mandatory:
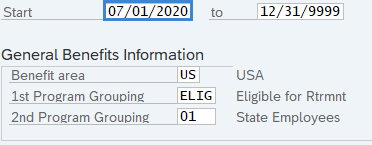
- Start
- Benefit area
- 1st Program Grouping
- 2nd Program Grouping
 TIPS:
TIPS:All employees must have an active General Benefits Information (0171) infotype record.
The Start Date will default to the date of the action. The Start Date must reflect the first day the employee becomes eligible for benefits. If the employee is eligible for benefits before the action date, update the start date to the date the employee became eligible. If the employee is ineligible for benefits, the Start Date should be the date of the action or the date the employee became ineligible.
The state of Washington only uses Benefit area US.
1st Program Grouping is used to determine an employee’s retirement plan eligibility. This field defaults as eligible for retirement. To verify that the employee is in an eligible position, contact your organizational management processor. If there are still questions surrounding eligibility, refer to the Department of Retirement Systems website or contact DRS at (360) 664-7200 or toll free at 1-800-547-6657.
2nd Program Grouping defines the employee’s job type and employer and defaults from the personnel area. You may need to change the 2nd Program Grouping field if:
- An employee chooses a different plan.
- The employee type defaults to a code not consistent with the System/Plan set up at hiring.
-
Step 13
Click the Enter button to validate the information.
-
Step 14
Click the Save button.
-
Step 15
Complete the Savings Plans (0169) infotype.
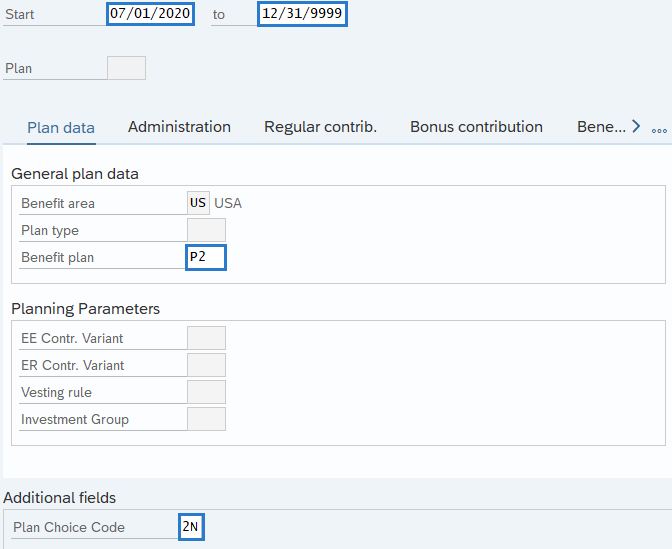
On the Plan Data tab, complete the following fields:
The following fields are mandatory:
- Start
- Benefit plan
- Plan Choice Code
 TIPS:
TIPS:The Start Date will default to the date of the action. The Start Date must reflect the first day the employee becomes eligible for benefits. If the employee is eligible for benefits before the action date, update the start date to the date the employee became eligible.
The To date should reflect the end date of the 12/31/9999.
Enter the Plan Choice Code that corresponds with the ERA Member Verification Report.
Returning PERS/TRS Plan 3 members will have 90 days to select a rate and investment option or they will default to Rate Option A, Self Investment program.
-
Step 16
Click the Enter button to validate the information.
TIPS:You will be taken to the Regular Contrib. (Regular Contribution) tab.
-
Step 17
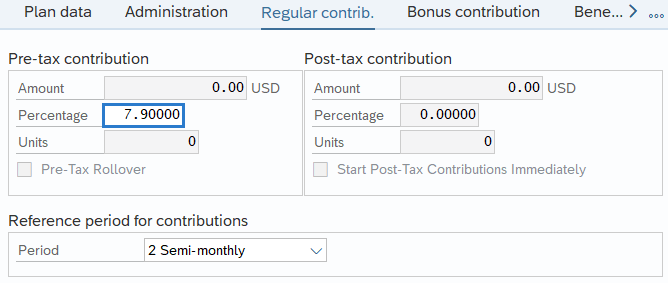
Complete the following field:
The following field is mandatory:
- Percentage
 TIPS:
TIPS:Enter the employee’s contribution percentage for their plan. If you are uncertain of the current percentage rate, click the Enter button one time to see a warning message containing the correct percentage.
-
Step 18
Click the Enter button to validate the information.
-
Step 19
Click the Save button.
Stop:For the benefits processor, this will mark the end of the New Hire action. After saving, click the Exit button and if necessary, contact the time and attendance processor who may have entries to complete for the employee.
Visit Health Care Authority (HCA) Personnel and Payroll section for information regarding enrolling employees in medical coverage if applicable. Medical benefit elections are entered into Pay1 and subsequent records sent directly to HRMS within a GAP file to process through payroll. For assistance related to Pay1, please contact HCA Help Desk at 360-725-1111 or by emailing ISPEBBSR@HCA.WA.GOV.
Manual adjustments for healthcare premiums may be required for new employees. Refer to the Manual Adjustments for Healthcare Premiums - New Hire or Rehire procedures.
For employees who are choosing PERS/TRS Plan 3, or who are returning to PERS/TRS Plan 3, follow the Savings Plans user procedures once they have made their plan, rate, and/or investment program selections. No additional action is needed for employees choosing or returning to PERS/TRS Plan 2, PSERS, or WSPRS retirement plans.