Garnishments - Writ Processing - Reactivate for Refund
Use this procedure to reactivate a writ for refund on the Garnishment Document (0194) infotype. Perform this procedure when a notification of writ refund is received by the agency.
A garnishment must be in Released status to reactivate for refund.
Once the payroll process has begun for the current period, a garnishment document should not be updated. If trying to change a document after Day 0 of the payroll process, you will need to contact the OFM Help Desk at HeretoHelp@ofm.wa.gov to request for Stored Results to be deleted.
Service of a writ on the Office of the Attorney General is required pursuant to RCW 6.27.040 and RCW 4.92.020. If an agency receives a writ directly, without prior service on the Office of the Attorney General, return the writ to the creditor (plaintiff) noting that it was improperly served.
Before you begin, if you have questions on administering a writ, please contact the Public Records and Constituent Services Unit at the Attorney General’s Office:
(360) 753-9673
publicrecords@atg.wa.gov
-
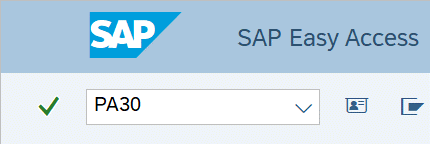
Step 1
Enter transaction code PA30 in the command field and click the Enter button.
-
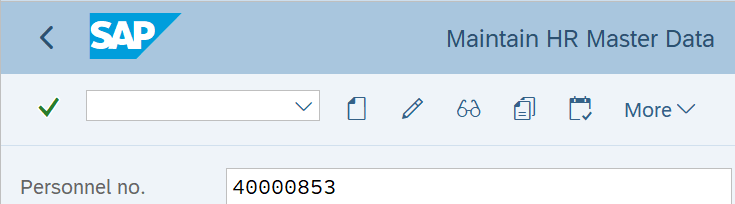
Step 2
Complete the following field:
- Personnel no.
-
Step 3
Click Enter to populate the employee information.
-
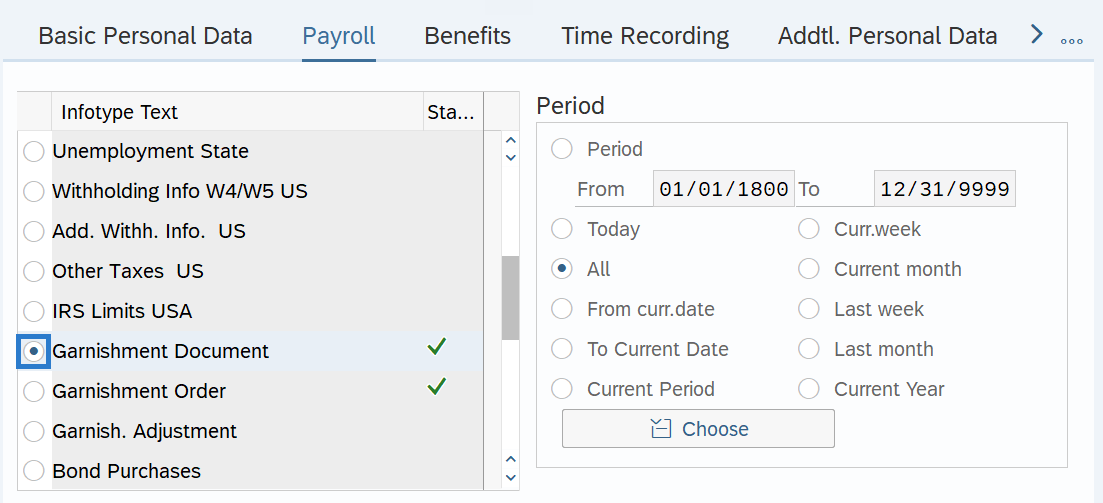
Step 4
On the Payroll tab, select the Garnishment Document radio button.
-
Step 5
Click the Overview button.
-
Step 6
Select the radio button to the left of the writ to reactivate for refund.
 TIPS:
TIPS:To determine which garnishment is in “released” status, look in the “Sta” column of the overview. The numbers listed in that column indicate the status of the garnishment:
- Active
- Pending
- Inactive
- Released
- Reactivated for refund
- Rejected
- Bankrupt
-
Step 7
Click the box to the left of the writ to reactivate for refund.

-
Step 8
Complete the following fields:
The following fields are mandatory:
- Start
- To
- Status
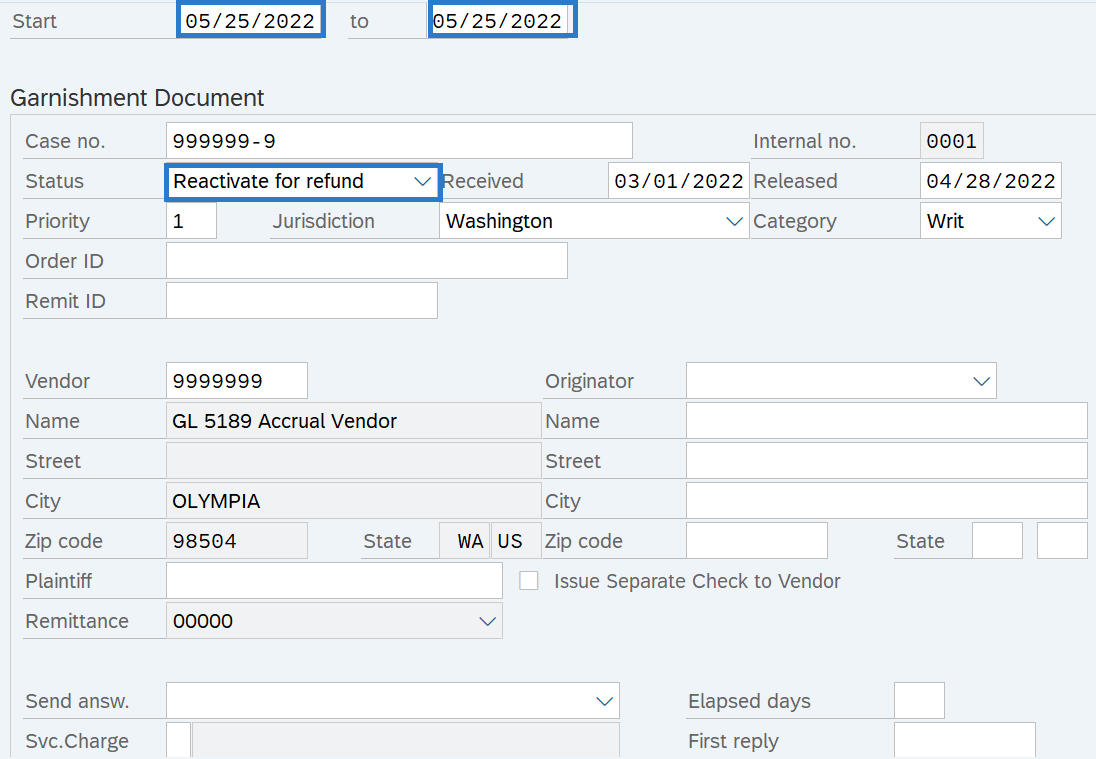 TIPS:
TIPS:The Start and To date should reflect the actual check date of the refund. If you are uncertain of the check date, refer to the Payroll Calendar.
The Status should be Reactivate for Refund.
-
Step 9
Click the Save button.
-
Step 10
Click Continue in the Display Messages dialog box.
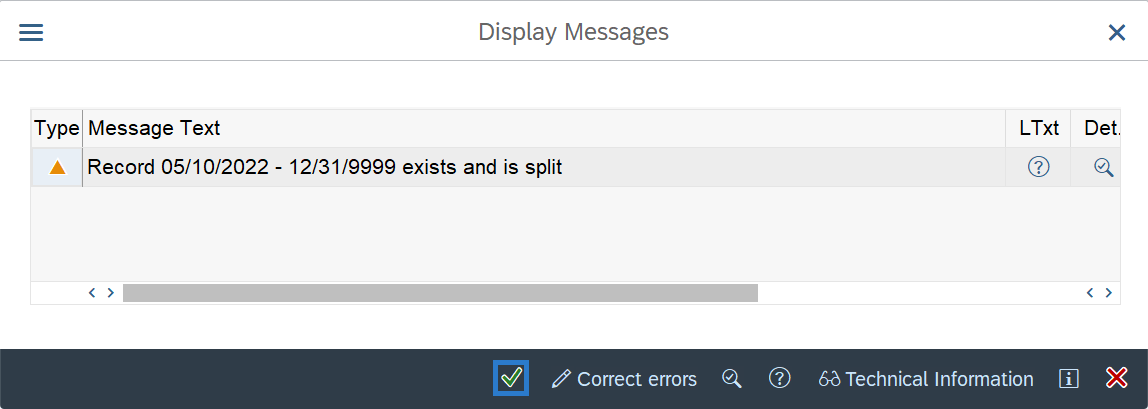 TIPS:
TIPS:Once you click on continue, you will be taken to the List Garnishment Document to select the correct garnishment for the refund.
-
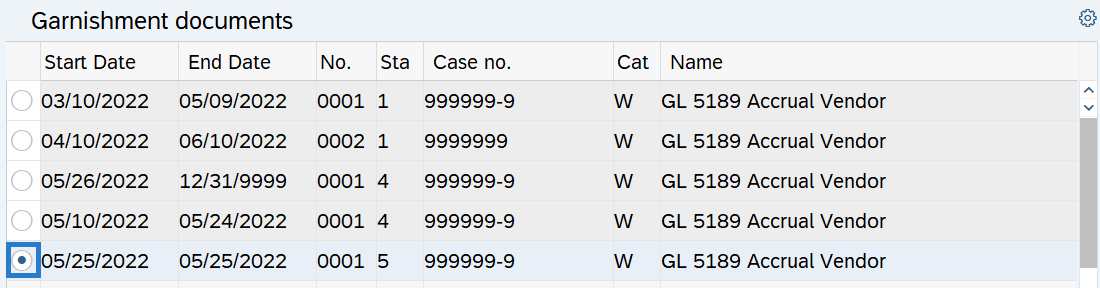
Step 11
Select the radio button to the left of the garnishment for the refund.
-
Step 12
Click the Change button.
TIPS:Using the Change button overwrites the existing record.
-
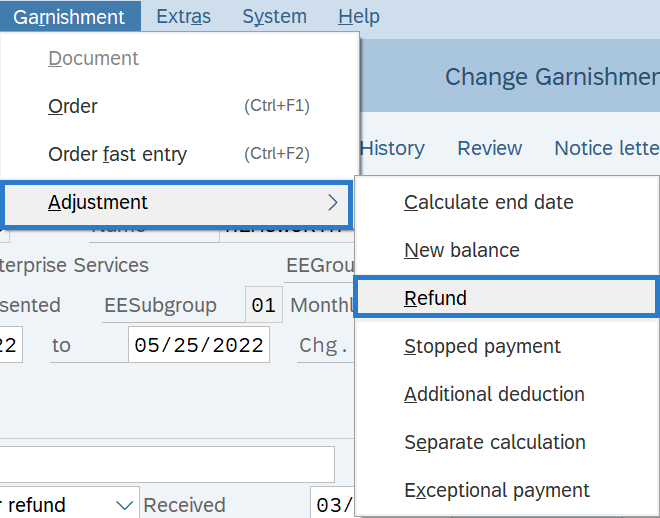
Step 13
From the Menu bar, click Garnishment/Adjustment/Refund.
-
Step 14
Complete the following fields:
The following field are mandatory:
- Adjustment Date
- Adjustment Amount
- Adjustment Wage Type
The following field will default:
- SeqNo of garn orders
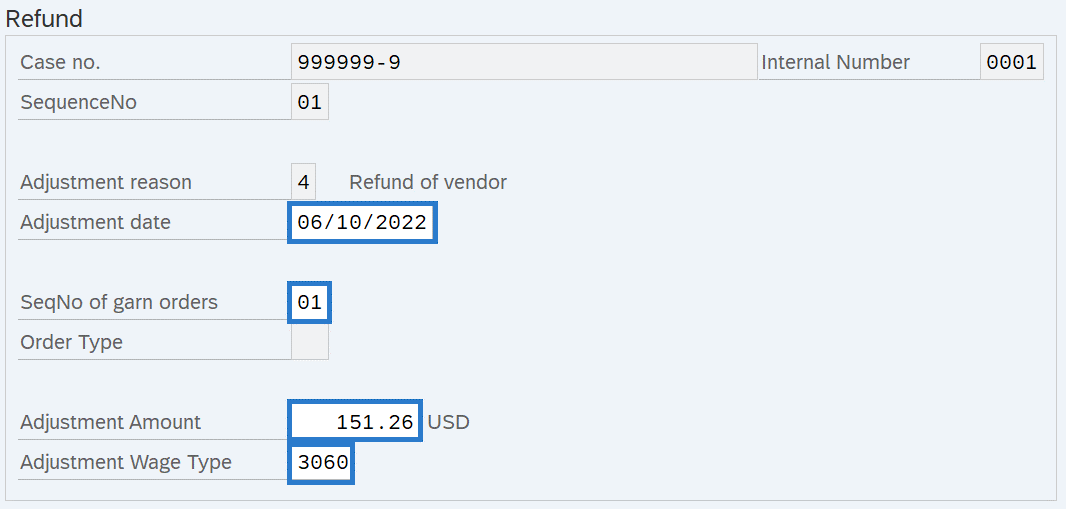 TIPS:
TIPS:The Adjustment Date is the actual check date the refund is to begin for the employee. If you are uncertain of the check date, refer to the Payroll Calendar.
The SeqNo of garn orders is associated with the number of garnishment orders that exist for the employee.
The Adjustment Amount is the dollar amount of the refund to be adjusted.
The Adjustment Wage Type is the wage type representing the type of garnishment adjustment being created. Use the matchcode if you are uncertain of the Adjustment Wage Type.
-
Step 15
Click the Enter button to validate the information.
-
Step 16
Click the Save button.