Payroll Simulation – Identify an Overpayment or ALAS Error
Use this report procedure to identify how changes to an employee’s pay, deductions, and/or retro calculations will affect their pay, or to identify the amounts and periods affected by overpayment.
This procedure shows how to read the payroll simulation results to identify overpayments or ALAS errors. Refer to other Payroll Simulation procedures for information on completing the report selection screen or other specific tasks.
Before running this report to identify overpayments, the employee’s payroll master data must be corrected. When the master data is corrected, HRMS will try and collect the full overpayment in the current period. An offset must be entered to stop the automatic collection of the overpayment. Then once a repayment agreement is in place, processors may move forward with collection. Refer to the Overpayment – Offset an Overpayment or Retirement Overpayment – Offset an Overpayment user procedures. Also refer to OFM Statewide Accounting Overpayment resources and agency policy for more information.
The Payroll Simulation report generates a simulation for the payroll results as they will process within the final payroll run if no further adjustments are made to an employee’s master data. Be sure to work closely with processors from other functional areas as needed.
The HRMS Processor Guide recommends running this report at minimum, on Payroll Days 2 and 3, however processors can use this report at any time to validate master data changes for payroll purposes.
If an employee has a payroll redline, the payroll simulation will stop processing at the point of the error and the full simulation will not be available. If a payroll redline is shown in your simulation, refer to the Payroll Simulation – Correct a Payroll Redline report to fix the error.
To ensure accurate pay results, an hourly employee should have accurate time entered in HRMS for the selected pay period.
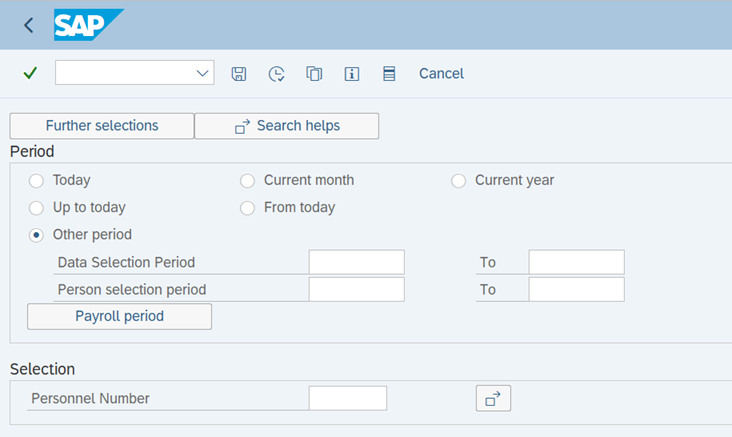
Complete the steps for Payroll Simulation – Execute a Payroll Simulation.
Click the folder to the left of the following selections:
- Successful personnel numbers
- Personnel number/ employee name

Click the folder to the left of the earliest pay period in the retroactivity.
 Tips:
Tips:If an overpayment has occurred in multiple pay periods, review each of the affected pay periods separately.
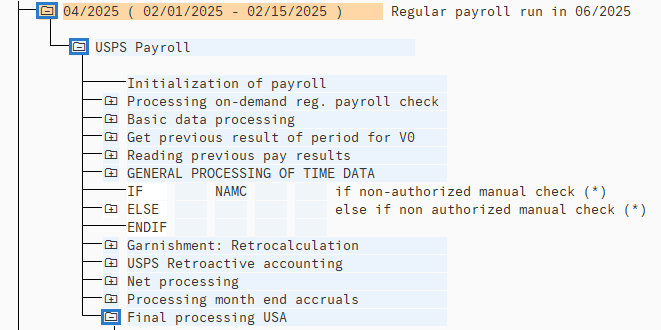
Click the folders to the left of the following selections:
- USPS Payroll
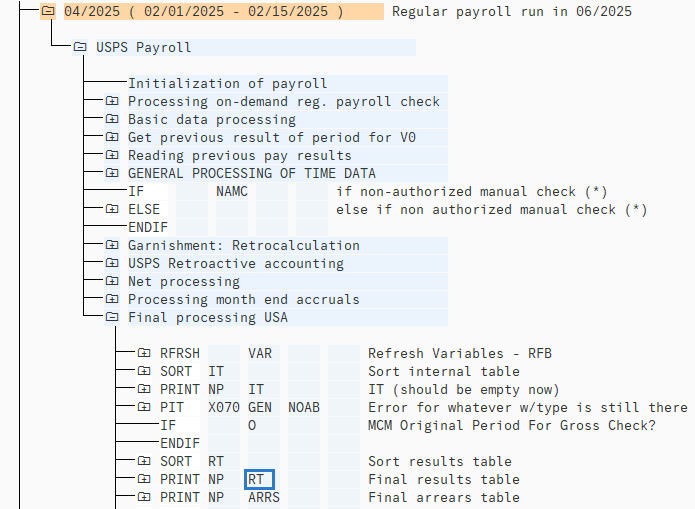
- Final Processing USA
Double click RT to review the Results Table detail:
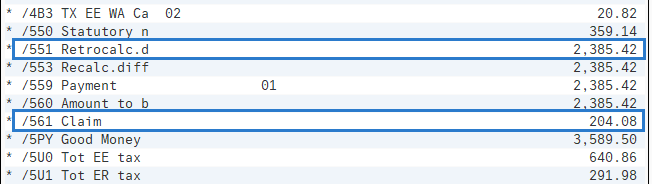
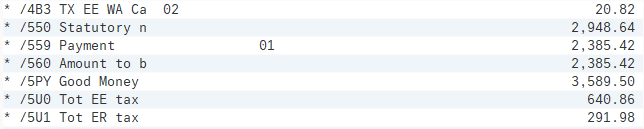
Review the results to identify the amount of pay changes that occurred. First, review the /5 wage type series to see if any of the following wage types are present:
- /551 (Difference)
- /561 (Claim)
 Tips:
Tips:If /552 is present, you are not in the earliest period within the retroactivity. Repeat steps 1 through 6 of this procedure to ensure that you are beginning at the earliest period within the retroactivity.
If /553 is present, it will match the /551 amount. The /553 wage type can be ignored in an overpayment situation as it is not always triggered, but when it is, it will mirror /551.
If an employee is reporting as having an ALAS error on the Payroll Errors Report and there is no /561 Claim in the current period, please send an email to HeretoHelp@ofm.wa.gov for assistance.
Determine the total amount of the gross overpayment by adding the amount of all overpayment wage types that were identified.
Tips:Add the amounts from/551 Difference and /561 Claim to calculate the gross overpayment. In this example, the payroll simulation identified a /551 Difference for $2,385.42 and a /561 Claim for $204.08. The gross overpayment amount for the period is $2,589.50 ($2,385.42 + $204.08).
As stated in Step 6, ignore the /553 amount when calculating the gross overpayment.
Click the New Session button to open a new HRMS session and follow the Overpayment – Offset an Overpayment or Retirement Overpayment – Offset an Overpayment user procedure to offset your overpayment.
Tips:When the master data is corrected, HRMS will try and collect the full overpayment in the current period. An offset must be entered to stop the automatic collection of the overpayment. Then once a repayment agreement is in place, processors may move forward with collection.
In this example, along with the information provided in the Overpayment – Offset an Overpayment user procedure, we have determined the following data will be entered into Additional Payments:
- Wage Type = 3231
- Amount = $2,589.50
- Date of Origin = 2/1/2025

After saving your entries in the Additional Payments (0015) infotype screen, return to the Payroll Simulation screen and click the Back button until you return to the Payroll Simulation home screen.
Repeat Steps 1 through 6 of this procedure to execute an updated Payroll Simulation and review the payroll data for each period within the retro after you completed and saved the offset for the employee. Review each period in order of their occurrence, oldest to most current. An offset is needed for each period that an overpayment occurred.
Review the results to identify if the employee’s payroll has been correctly offset. Look in the /5 wage type series to verify the following wage types are no longer present:
- /551 (Difference)
- /561 Claim
Scroll down to the lower section of the payroll simulation to verify your offset is processing properly:

Click the Back button to return to the payroll simulation.
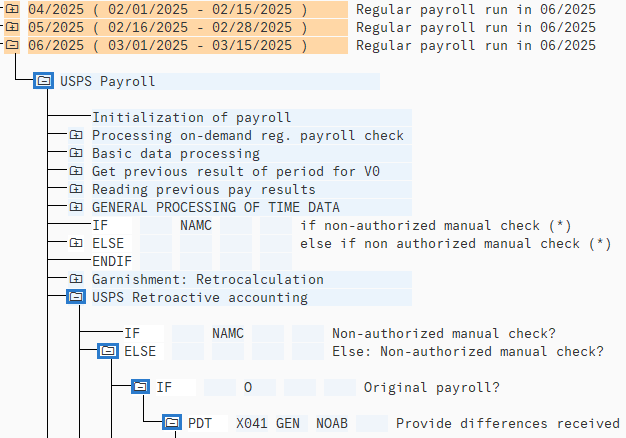
Scroll down to the current pay period folder within the employee’s payroll simulation and click the folders to the left of the following selections:
- USPS Payroll
- USPS Retroactive accounting
- ELSE
- IF
- PDT (Provide differences received)
Double click Input to view the Table PDT results.
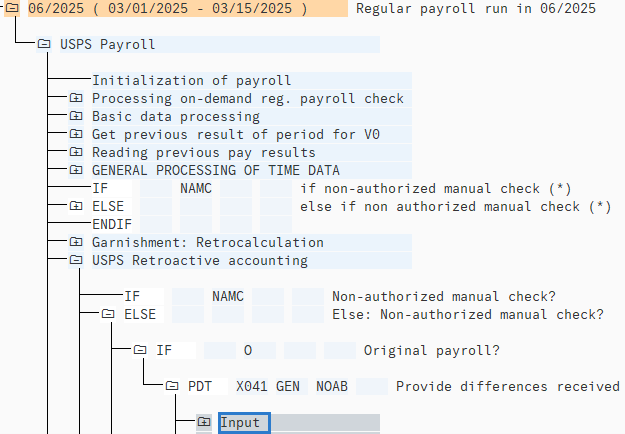
Review the results to identify if any periods are present with a /551 Difference:

If there are no /551 Differences present, you have correctly offset the employee’s full overpayment and may resume following overpayment process to notify the employee and establish a repayment agreement.
If /551 Differences are identified, repeat the steps in this procedure until no /551 Differences can be identified in the Results Table (RT) or Difference Table (PDT).