New Hire Action (PY) - Create New Hire Action
Use this procedure to complete the payroll portion of the New Hire Action. The personnel administration portion of the New Hire Action must be completed first.
As the payroll processor, you will not process this action until you have received a new hire information packet from the personnel administration processor indicating they have completed their portion of the action.
This procedure may require hand-offs to other roles (such as benefits processor) depending on the structure of your agency and your role at the agency. Refer to the New Hire Action (BN) - Create New Hire Action procedure for completing the benefits portion of the action.
-
Step 1
Enter transaction code PA40 in the command field and click the Enter button.
-
Step 2
Complete the following fields:
- Personnel no.
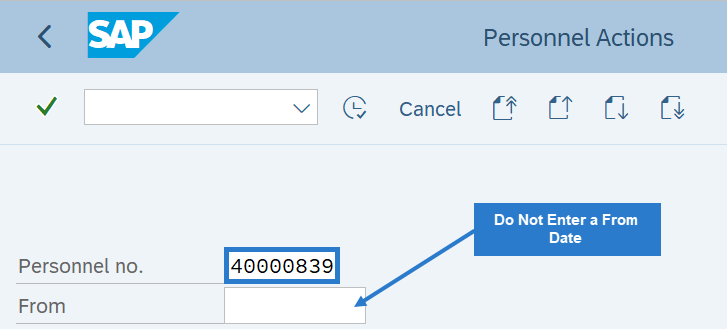 TIPS:
TIPS:Do not enter a From date on the Personnel Actions screen.
-
Step 3
Click Enter to populate the employee information.
-
Step 4
Select the New Hire radio button.

-
Step 5
Click the Execute button to begin the transaction.
-
Step 6
Verify the Actions (0000) infotype contains the correct action you need to execute.
-
Step 7
Click the Execute info group button.

-
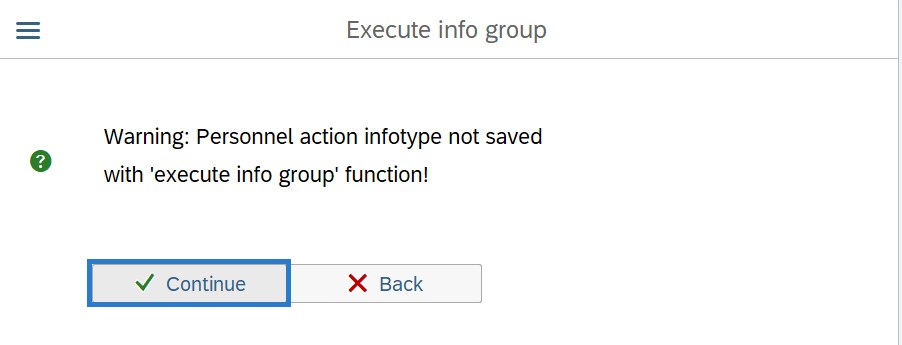
Step 8
Click Continue in the Execute info group dialog box.
-
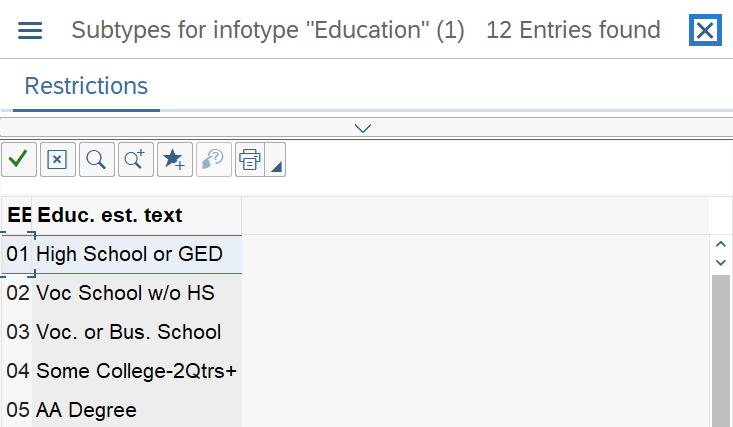
Step 9
Click the Next Record button until you reach Subtypes for infotype “Education” window.
-
Step 10
Click the Close button to by-pass Subtypes for infotype “Education” window.
-
Step 11
Continue to click the Next Record button until you reach the Bank Details (0009) infotype.
-
Step 12
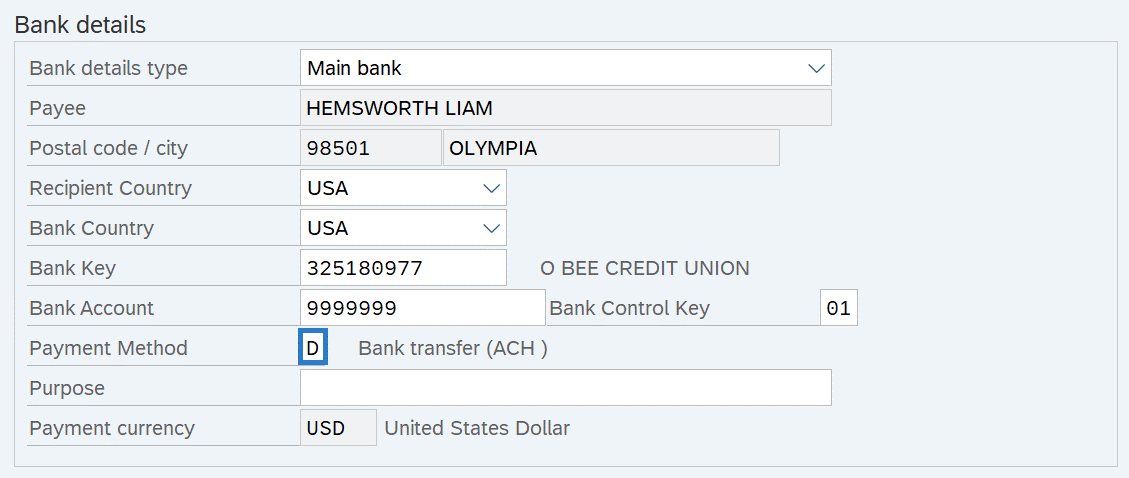
Complete the Bank Details (0009) infotype.
The following fields are mandatory:
- Payment Method:
- C – Warrant
- D – Bank transfer (ACH)
If you selected D - Bank transfer (ACH), the following fields are also mandatory:
- Bank Key
- Bank Account
- Bank Control Key:
- 01 – Checking
- 02 – Savings
 TIPS:
TIPS:Bank Details Type must be Main Bank.
The state of Washington does not accommodate payments to multiple financial institutions.
If the Payment Method is C - Warrant, the Bank Key and Bank Account fields must be blank.
State of Washington employees may opt to utilize two direct deposit options which will deposit employee’s net funds into their desired account type using ACH (Automated Clearing House):
- Traditional checking or savings account the employee has set up directly with their financial institution, or
- The U.S. Bank Focus Card, which is a prepaid Visa® offered through the State of Washington as an alternative to receiving paper checks.
Employee’s choosing the U.S. Bank Focus Card will require assistance from agency payroll processors to setup their prepaid card. After the one-time setup process is complete, U.S. Bank issues a card in the employee’s name and mails it to the employee. Prior to the first use, employees must activate the card either by phone (877-474-0010) or by visiting U.S. Bank website. Once the card has been activated, the cardholder must contact the agency payroll office to initiate electronic deposit of payroll funds.
Refer to the State of Washington Payroll Card Program and OFM’s Focus Card FAQs for more information on Focus bank cards.
If the employee has completed the Authorization for Automated Clearing House (ACH) Direct Deposit of Wages form identifying where they would like their pay check deposited, complete the Bank Key, Bank Account, Bank control key, and Payment method fields.
For Payment Method D - Bank transfer (ACH):
- Bank Key is often referred to as the bank or financial institution's routing or transit number.
- For Bank control key, use 01 for checking and 02 for savings accounts.
When entering or changing a Bank transfer (ACH) record, the system initiates the pre-note process. The first ACH transfer of wages will depend on when the record was keyed. A Bank transfer (ACH) record keyed 10 day prior to Payroll Day 3 will be in effect for that payroll. If the record is not keyed 10 days prior to Day 3, the system may create a warrant for that payroll.
Consider sending an EFT Employee Letter after you have created or maintained an employee's Bank Transfer (ACH) record. Refer to the EFT Employee Letter report procedure.
Important note for Bank transfer (ACH): You must monitor Corrections and Returns (ZHR_RPTPY151) Report for Notifications of Changes (NOC) or Returns (NOR) reported by the financial institution. Failure to do so may result in deposits not processing correctly.
- Payment Method:
-
Step 13
Click the Enter button to validate the information.
-
Step 14
Click the Save button.
TIPS:You must save the Bank Details (0009) infotype even if the record should default to warrant. If you do not save this infotype, the employee will red line on payroll reports and will not process through payroll until a Bank Details (0009) infotype is created and saved.
-
Step 15
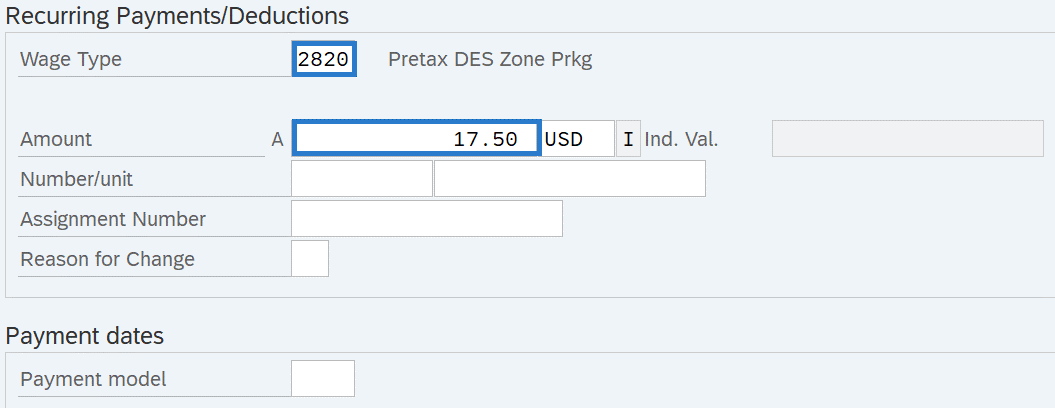
Complete the Recurring Payments/Deductions (0014) infotype.
The following fields are mandatory:
- Wage Type
- Amount
The following fields are conditional:
- Payment Model
 TIPS:
TIPS:If the Payment Model is left blank, the system will default to WA04 - Every Pay Period - Full Amount.
Choose from one of the following Payment Model codes:
- WA01: Every Pay Period - Half Amount
- WA02: 25th Pay Period - Full Amount
- WA03: 10th Pay Period - Full Amount
- WA04: Every Pay Period - Full Amount
- 1162: April 10th and October 10th
- 1163: Jan 25th - Annually
Do not use Payment Model codes other than those listed above.
If the Wage Type selected requires an amount and you have not created an entry in the Amount field, you will receive the following error:
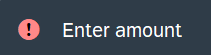
Enter Amount and click Enter to correct.
If the Wage Type selected has a standard Amount/Rate/Max and cannot be changed, you will receive the following error:

Remove Amount and click Enter to correct.
During the New Hire Action, only one Recurring Payment/Deductions (0014) infotype record can be created. If the employee has multiple Recurring Payments/Deductions, follow the Recurring Payment/Deduction - Create New Record procedure.
-
Step 16
Click the Enter button to validate the information.
-
Step 17
Click the Save button.
-
Step 18
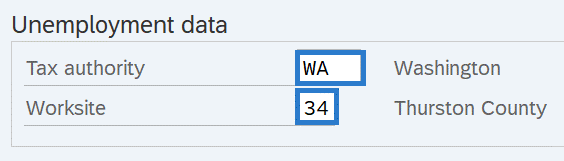
Complete the Unemployment State (0209) infotype.
The following fields are mandatory:
 TIPS:
TIPS:Set the Tax authority to the state in which your employee is covered (where the work is localized); only Washington, Oregon and Idaho are configured in HRMS. If the employee’s work is localized in Oregon or Idaho, you may also update the Unemployment State during the Additional Steps for Out of State Employees process.
For employees with Washington (WA) Tax Authority, the Worksite field should reflect the employee’s primary work location.
For employees with Oregon (OR) or Idaho (ID) Tax Authority, there is only one valid Worksite selection option for each.
Refer to the Out-of-State Employee Coding Guide and HRMS Data Definitions Resource Guide for more information on which taxes are controlled by this infotype.
-
Step 19
Click the Enter button to validate information.
-
Step 20
Click the Save button.
-
Step 21
Complete the Withholding Info W4/W5 US (0210) infotype.
The following fields are mandatory:
- Start
- Filing Status
- Withholding Format:
- Redesigned (TCJA)
The following fields are optional:
- Tax Exempt Ind.
- Use Higher Withholding Rates Schedule
- Credits for dep.
- Other income
- Deductions
- Add.withholding
- Non-resident tax calculation
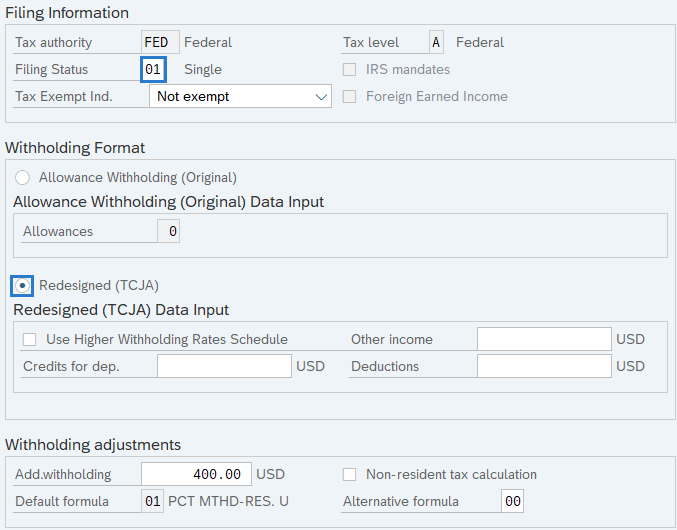 TIPS:
TIPS:The Filing Status, Credits for dep., Tax Exempt Ind., Add.withholding, Other income, and Deductions fields should be completed based on the employee’s Form W-4 – Employee’s Withholding Allowance Certificate selections. All employees hired after January 2020 must use the Redesigned (TCJA) to align with the selection options located on the form. The Allowance Withholding (original) is only used for employees who completed their W4 form prior to January 2020.
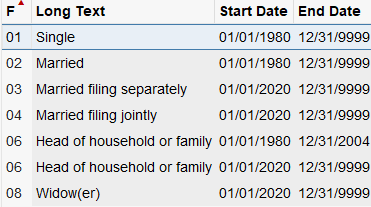
Filing Status should contain the box checked in Step 1(c) of the Form W-4:
- Single or Married filing separately:
- 01 or 03
- Married filing jointly (or Qualifying widow(er))
- 04 or 08
- Head of household
- 06
NOTE: Do not use 02 as it is for employees that have an active Form W-4 from 2019 or earlier.
- Single or Married filing separately:
The Use Higher Withholding Rates Schedule indicator should be checked if the employee has checked the box in Step 2 of the Form W-4.
Credits for dep. should reflect the total amount in Step 3 of the Form W-4.
The Tax Exempt Ind. field determines if the employee is exempt from taxation. The field will default to not exempt.
Using the Tax Exemption indicator “Y” will make the wages exempt from taxation and not reportable to the IRS.
Example for this indicator: Payments processed for deceased employees.
Using the Tax Exemption indicator “R” will make the wages exempt from taxation and earnings reportable to the IRS.
Example for this indicator: Employees who submit a W-4 with the filing status of “exempt.” Employees claiming except from withholding will write the word ‘Exempt’ in the space under Step 4(c) of the Form W-4.
Add.withholding should contain the amount in Step 4(c) of the Form W-4.
The Non-resident tax calculation indicator should be selected for an employee designated as a non-resident for payroll tax calculation purposes. See Publication 515, Withholding of Tax on Nonresident Aliens and Foreign Entities.
Other income should contain the amount in Step 4(a) of the Form W-4.
Deductions should contain the amount in Step 4(b) of the Form W-4.
-
Step 22
Click the Enter button to validate the information.
-
Step 23
Click the Save button.
-
Step 24
Complete the Add. Withh. Info US (0234) infotype.
The following field is mandatory:
- Empl. override group
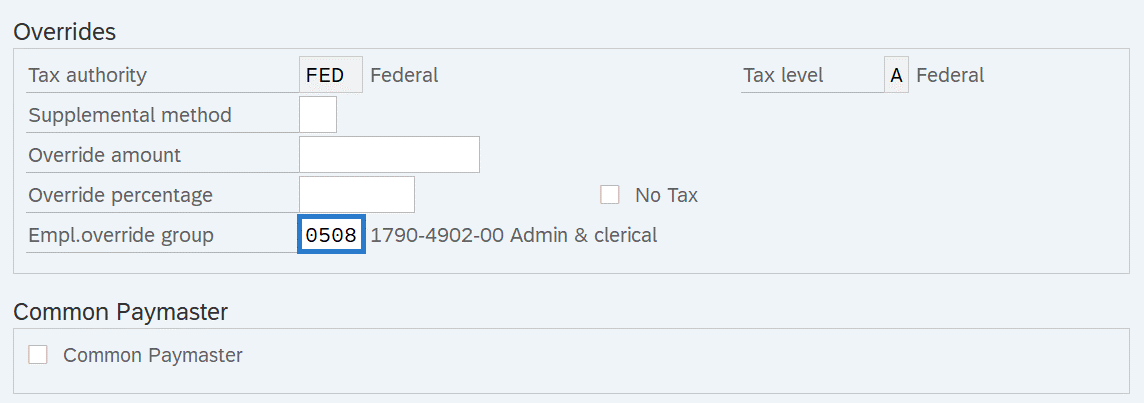 TIPS:
TIPS:The Supplemental Method field should be left blank. Do not enter a selection.
Use the Override amount field to enter a federal withholding override. An amount entered in the Override amount box will result in that exact amount of federal withholding for the period or periods the record is active.
Example, if $100 is entered into the override amount box, $100 is the total amount of the federal withholding that will process for the employee. The system will ignore any related entries on the Withholding Info W4/W5 (0210) infotype.
An override is most commonly used when an employee has been paid outside of HRMS and that payment is captured in HRMS using wage types 3101/3111, when an agency has made the choice to adjust the withholding amount to reflect what would have been deducted over 2 payroll periods.
Note: Agencies who choose to override are accepting the risk that the IRS could question the adjustment.
The Override Percentage field should be left blank. There is not a place on the W-4 that would allow for a percentage. Refer to IRS Publication 15, for information on Invalid Forms W-4.
Empl.override group (Employee Override Group) is the Washington Workers' Compensation risk classification that an employee holds for a particular job.
The Employee Override Group must match your agency Business Area. For this example, the employee has been hired into Business Area 1790 – Department of Enterprise Services. If the numbers do not match, it will cause incorrect Medical Aid amounts to be withheld from the employee. Additionally, employer costs will be incorrect.
The Common Paymaster field should be left blank. Do not use this checkbox.
The No Tax field should be left blank. Do not use this checkbox.
-
Step 25
Click the Enter button to validate the information.
-
Step 26
Click the Save button.
Stop:This marks the end of the New Hire action using PA40. The remaining steps in this procedure will direct you to make additional updates if necessary.
-
Step 27
If the employee lives or works in Oregon or Idaho, follow the Additional Steps for Out-of-State Employees user procedures to set up the appropriate taxes.
In addition, please work with the personnel administration processor to ensure an employee has an Out of State Work Location (9) address record.
-
Step 28
If the employee has an ESD approved exemption to the WA Cares Fund / LTSS program and has provided a copy of their approved exemption letter, then refer to the Other Taxes (US) – Create New Record procedure.
For more information on LTSS premiums and exemptions, see the Employer Long Term Services and Supports FAQ on the Payroll Reconciliation webpage.
Stop:For the payroll processor, this will mark the end of the New Hire action. After saving, click the Exit button and transfer the new hire information packet to the benefits processor who will continue the action. The benefits processor should refer to the New Hire Action (BN) - Create New Hire Action procedure to complete their portion of the action.